User Management
Organization
An organisation account is a special account that is used to group customers accounts. Once an organisation account is created several customer accounts can be created belonging to this organisation. Unlike customer and user accounts, organisation account cannot own any resources, e.g. device, groups, gateways, profiles, etc. cannot be created on an organisation account.
Add a new organization account to the DASS. Organizations can only be added by accounts with Organisation Admin Rights.
To add a new Organization, follow the below Steps:
- Navigate to Accounts
- Click on Manage Organization
- Click the Add Organization button.
This will bring up a window to define the organization. All fields in the window will do dynamic input verification and will highlight the field in red when an invalid value is entered and will turn green when the value is valid.
First, fill the Account ID, which is the sign-in name of the new organization account. The Account ID can be created using any letters, numbers and the following symbols ‘-‘ (dash), ‘_’ (underscore), ‘.’ (dot) and ‘@’. The ID must be a minimum of six (6) characters long.
Fill in the Password and Password Confirmation field.
Note: The password must be a minimum of eight (8) characters long.
Once the credentials are chosen, the account must be assigned its set of rights. The rights are grouped in four main tabs:
- Admin Rights
- Gateways
- Lora Location
- System Settings
The Admin Rights tab is shown below:
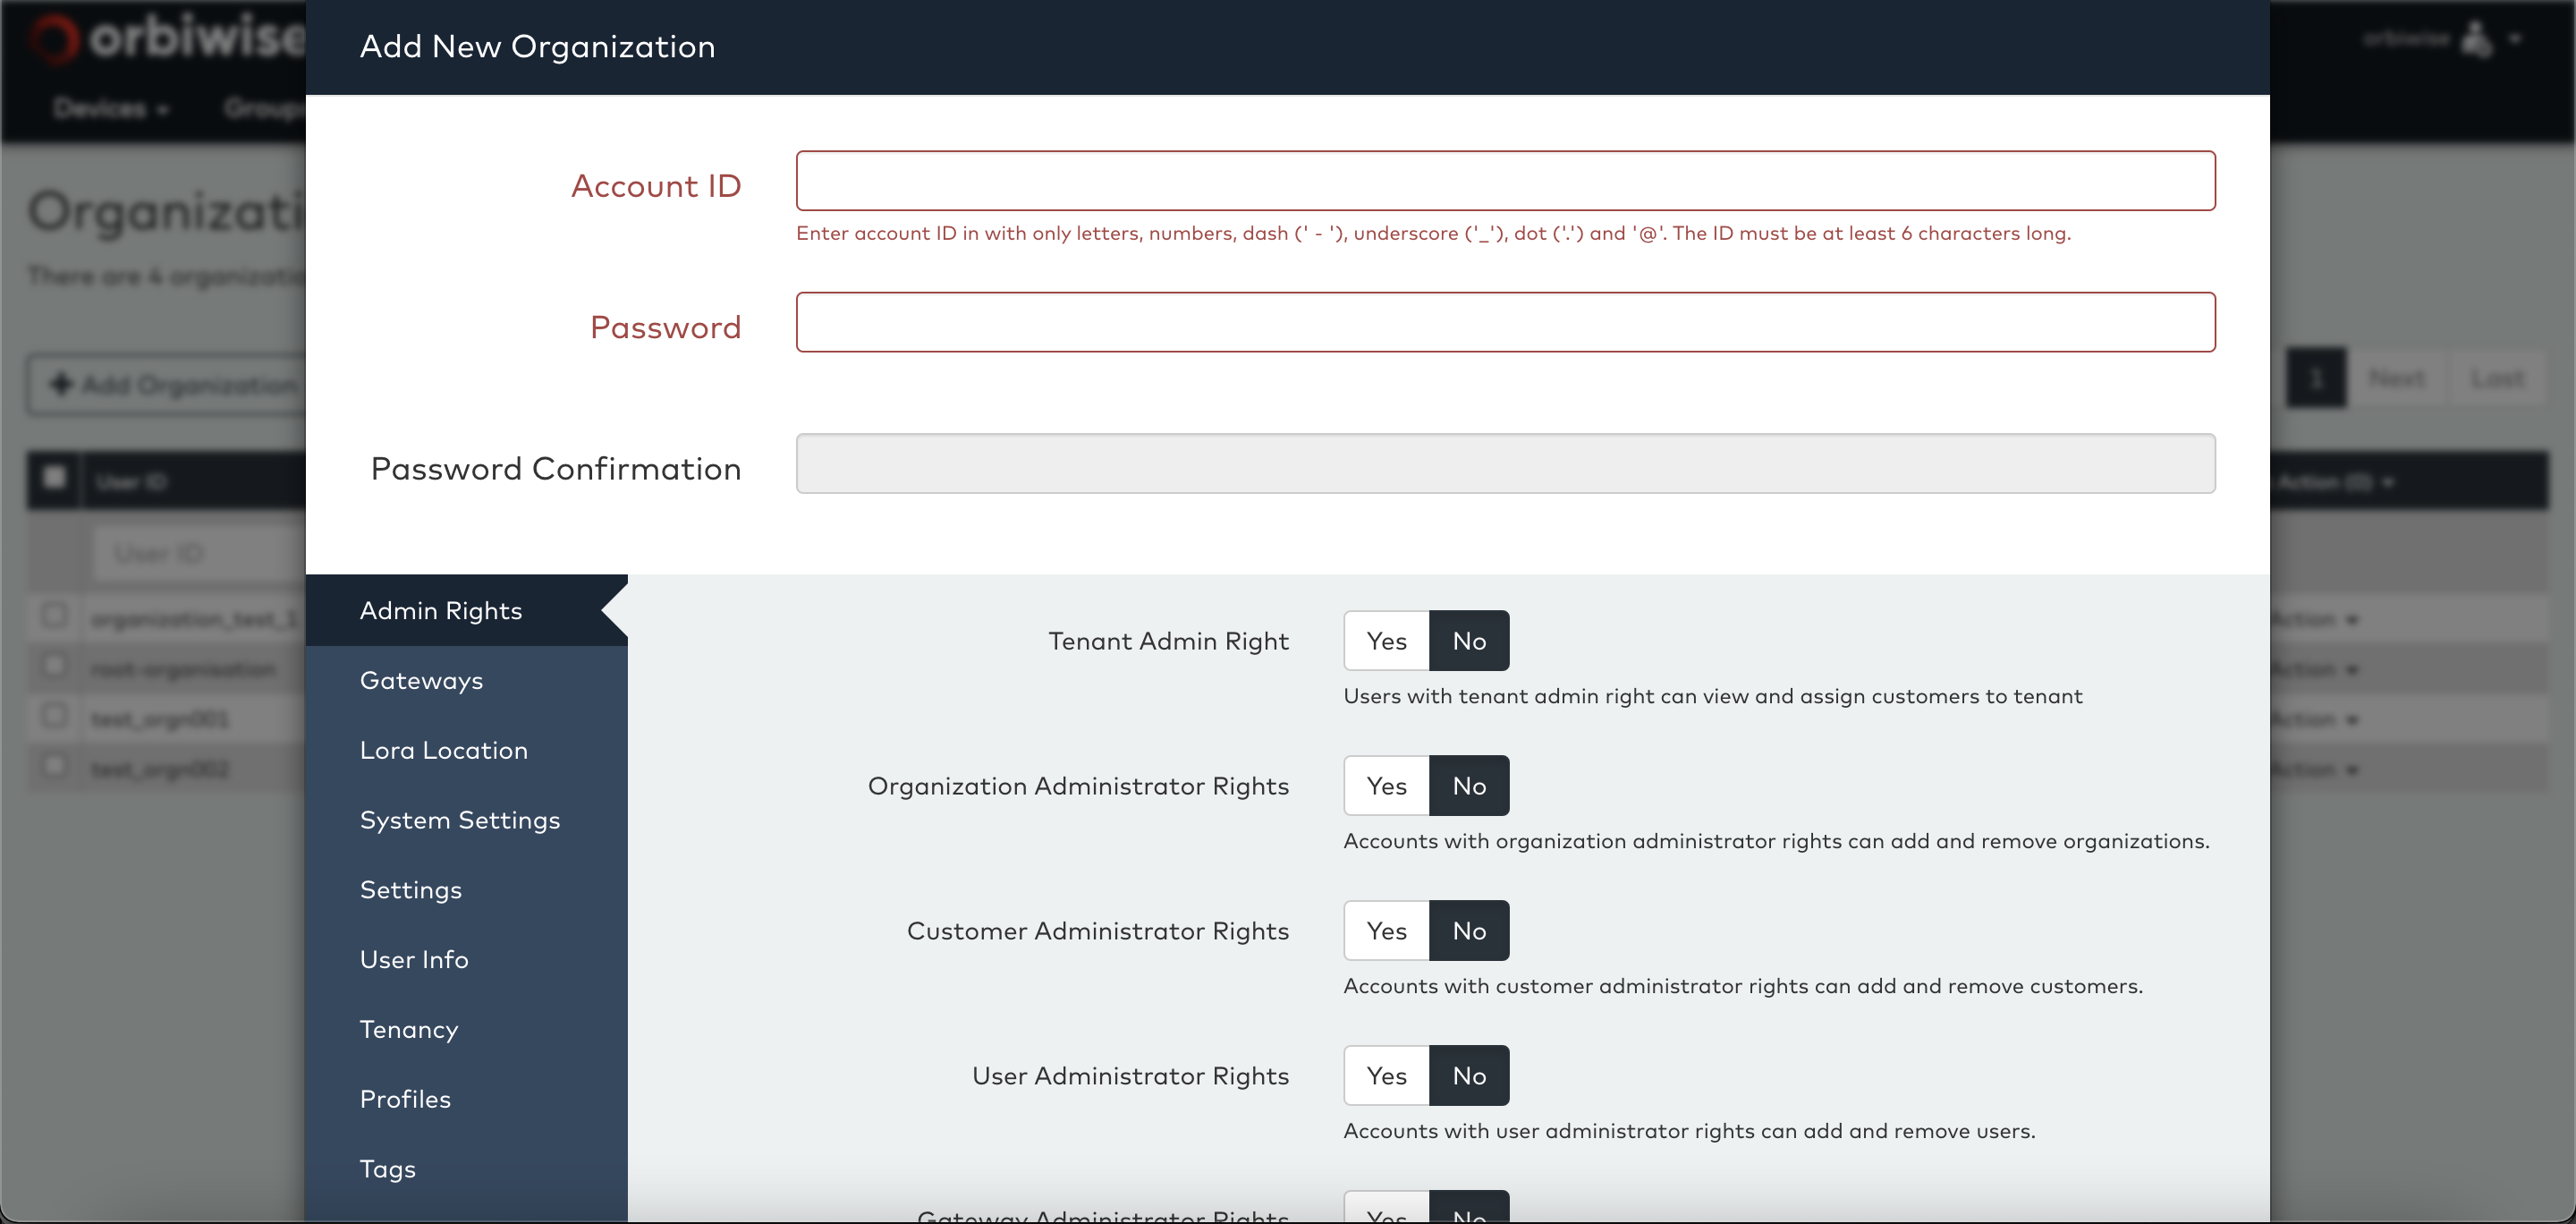
In the Admin Rights tab, account administration rights are controlled. There are five (5) types of administration rights:
Organization Administrator Rights: This is one of the highest level of administrative rights that can create an organization. The user with this right can group the customers and users in the specific group for better organization.
Customer Administrator Rights: This is the highest level of administrator. A customer administrator can create new customers and can access users and devices of all customers in the system. This right is normally reserved for only the operator’s own support and operations team. The option to grant an account, Customer Admin rights is only available from an account that is itself a customer administrator.
User Administrator Rights: When an account is granted User Admin rights, this account will be able to create other users and access all the users that belong to the parent account too. For a customer account, typically one or more of the users can be granted User Admin rights allowing the customer account owner (e.g. typically a company) to manage its own users.
Gateway Administrator Rights: Accounts that have Gateway Admin rights can assign gateways to an account that has rights to own gateways, i.e this right enables the Add Gateway button on the Gateways page. The option to assign this right is only available if the account creating the new user itself has this right.
When Gateway Admin Rights are assigned to an account that has either user-admin or customer-admin rights, that account can also assign gateways to other accounts.
Device Registration Rights: Accounts with this right can register new devices. Accounts without this right cannot (by itself) register devices and must rely on an administrator to add the devices. This right enables the Add Device button in the Devices page.
The next set of rights relates to Gateways and are available in the gateways tab and is shown below:
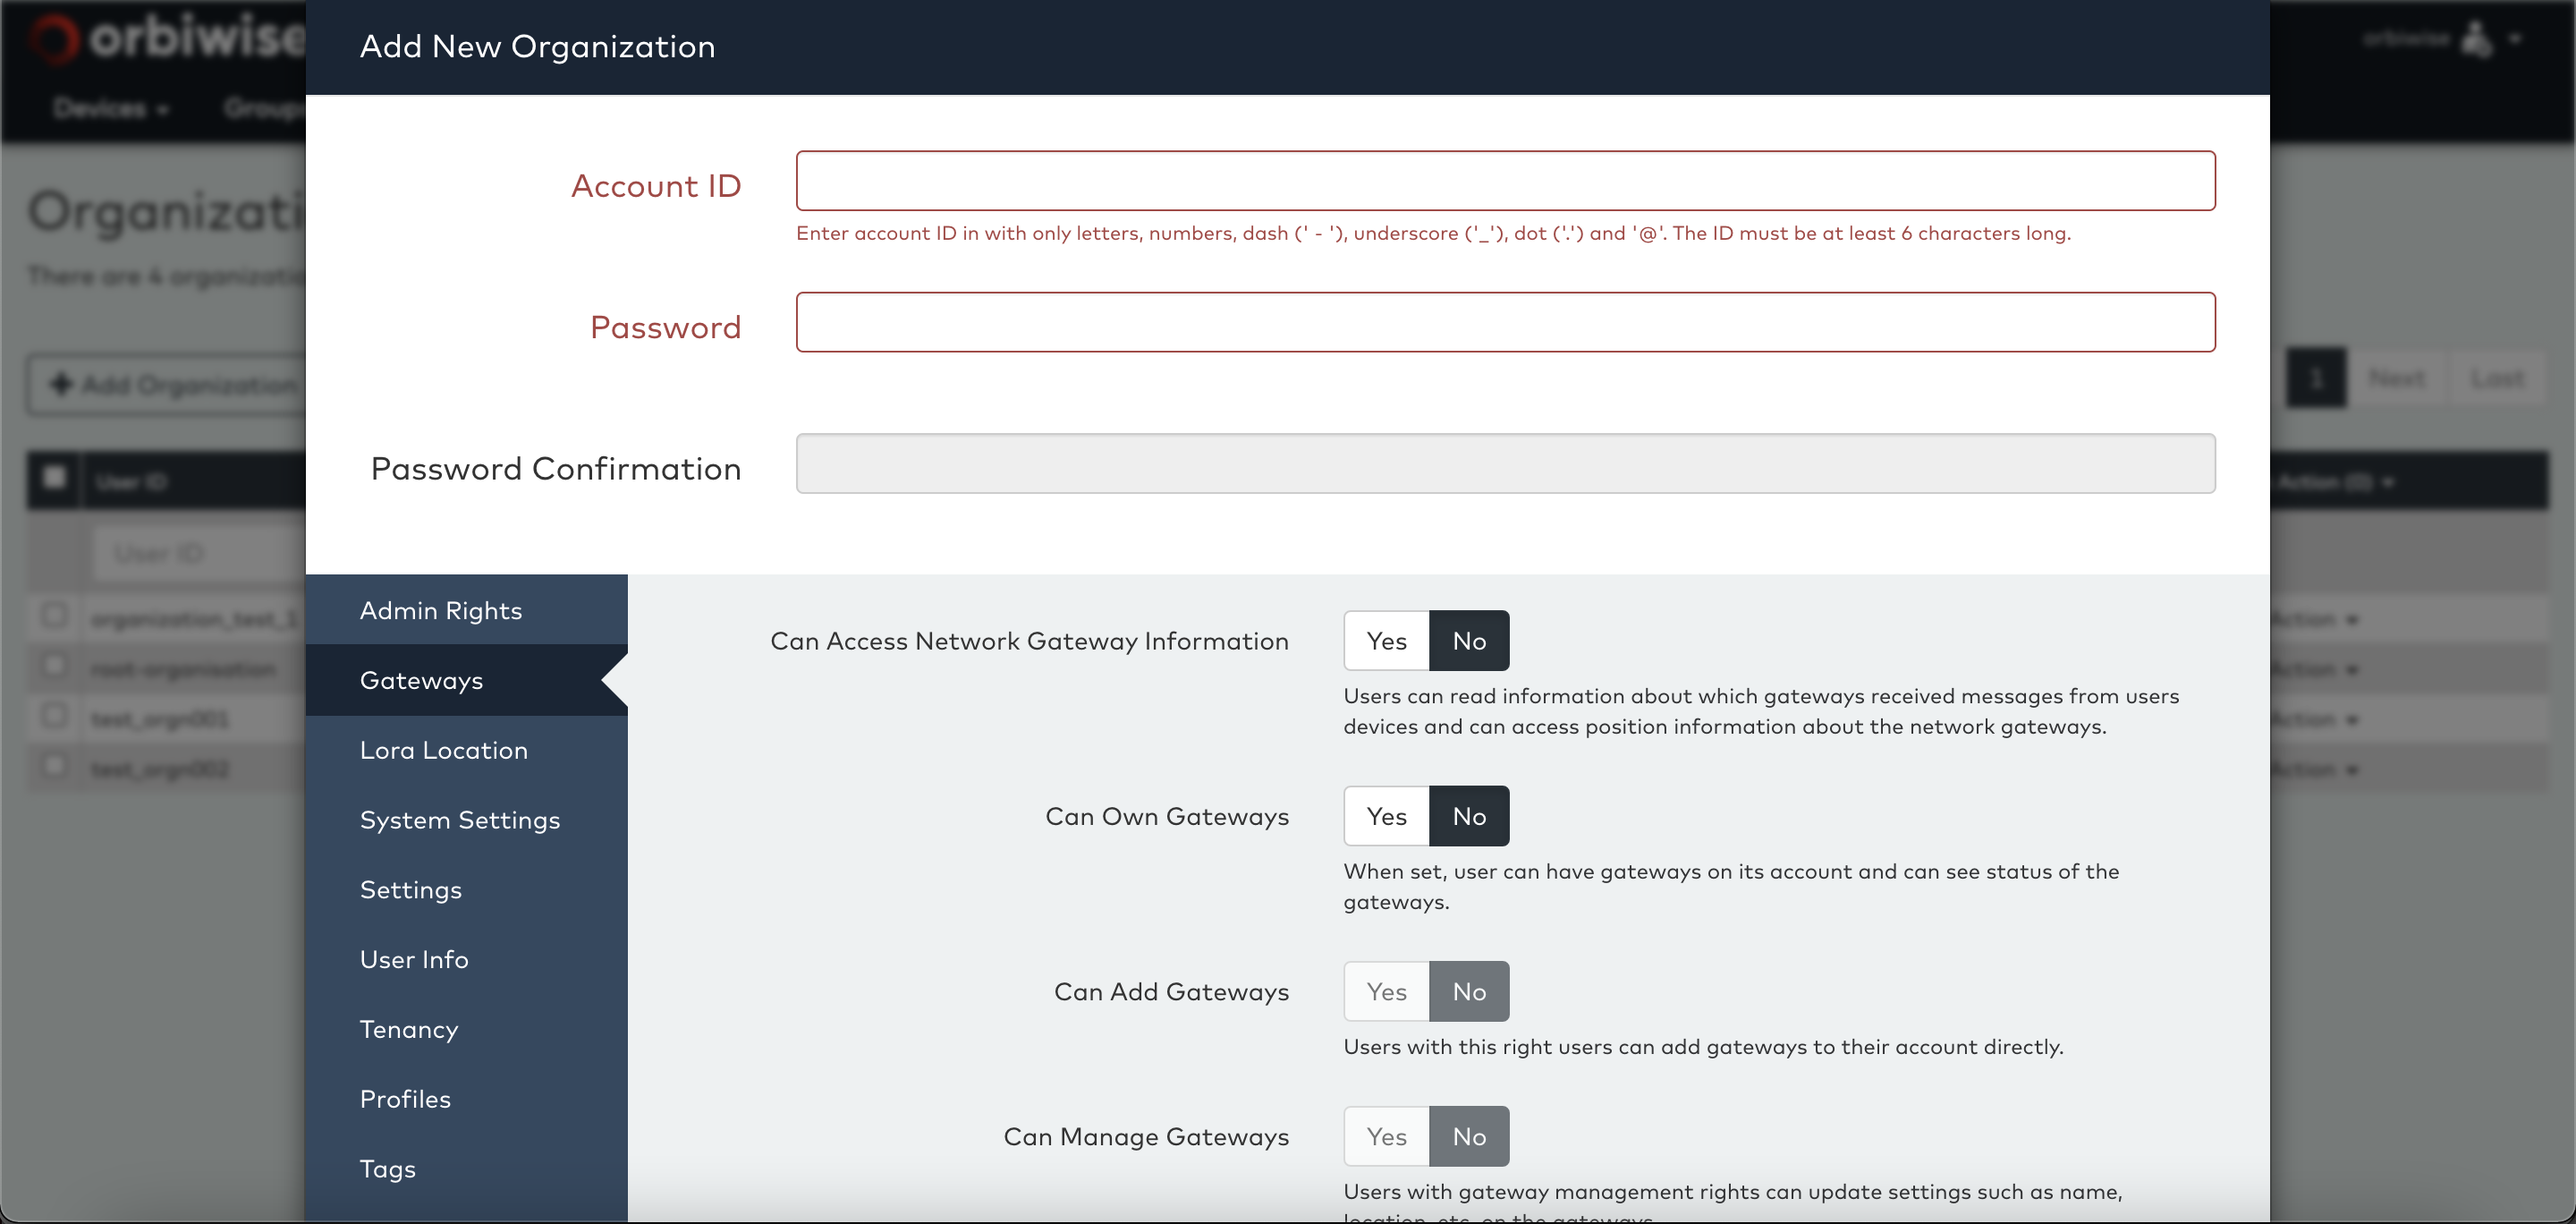
Can Access Network Gateway Information: This right allows the account to see details about which gateways have communicated with the devices, and further gives right for the account to query the location information about the gateways. This applies to all gateways in the entire network. Only an admin that itself has this right will have the option to grant this to other users. If the admin does not have the right, this option will be hidden from the window.
Can Own Gateways: Accounts with this right can have gateway associated with it. This right enables the Gateway tab for an account. Without this right, the Accounts tab is hidden.
Can Add Gateways: This right enables the Add Gateway button on the Gateways tab.
Can Manage Gateways: This right enables the user to manage the gateways(Add/Delete Gateways).
Gateway Location Information: This right enables the user to view the gateway location.
The next tab Lora Location gives control over the rights related to LoRa location.
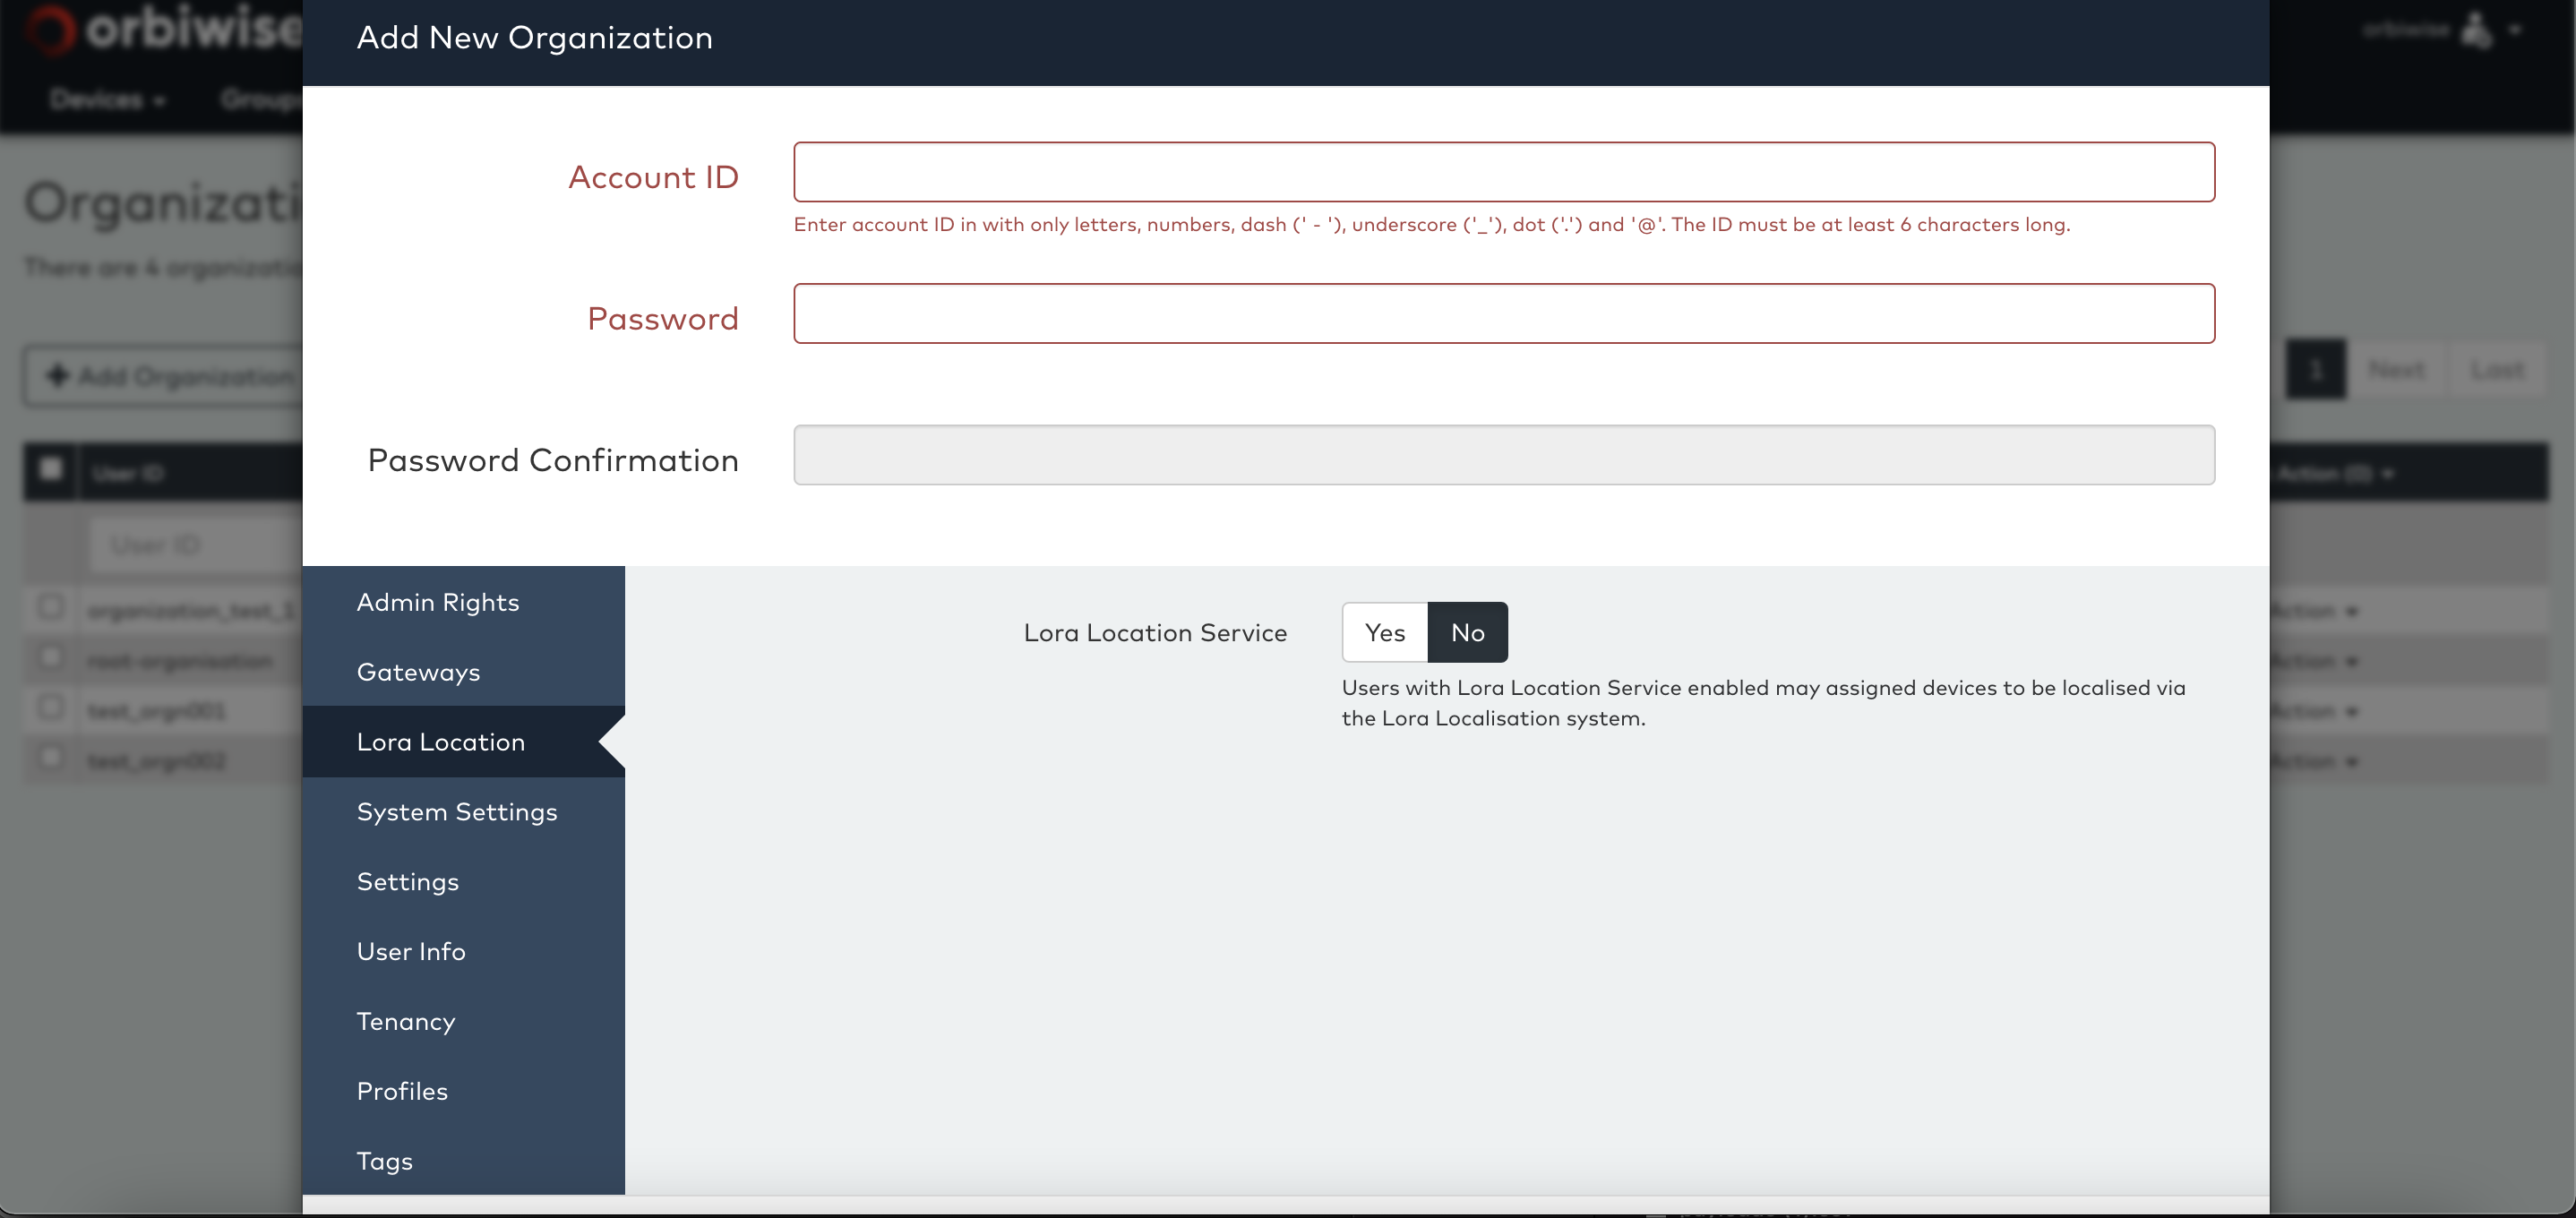
Lora Location Service: Setting this field to YES gives this account the right to enable Lora location estimation on its own devices. Without this right an account cannot enable location for its devices and will have to rely on an administrator to enable it.
The next tab, System Settings, relates mainly to IT management features. This right is typically assigned to customer administrator accounts of the operator’s internal IT support team.
System Administrator Rights: This right allows an account to change the log level related to an account. Only an account that has System Admin rights can assign this right to a new user. User admin accounts that do not have the system admin rights will not see this option.
Can Access User Logs: This right enables the user to view the event log which monitors the payload push to the Application. The user with this right has access to change the Log writing to DEBUG, INFO or ERROR as per their requirement.
Enable Extended Logging: Extended logging means that much more information gets logged for each transaction than relates to a user. E.g. when an uplink message is received and forwarded to an application, normally only a one-line summary is logged in the DASS log file. When extended logging is enabled for the user account receiving the message, the DASS will also log additional information. This is normally used for Debugging.
The Next tab, Settings which can be used for device payload related settings.
Maximum Number of devices: This defines the number of the devices a user is allowed to register in the Account.
MAC Message: This right enbales the user to view the MAC message in the Device Acitivity Section.
The next tab, Profiles relates to the rights that can be given to the users for the usage of profiles:
Under Profile we have six (6) total profiles out of which Device Profile and Service Profile are important for Device Registration via Profile.
List Device Profiles: This right allows to user to view all the shared device profiles. The user will not be able to Edit or Delete the profile.
Inspect Device Profiles: This right allows to user to view all the shared device profiles. This also allows the user to view the conent of the profile and not edit.
Create Device Profiles: This right allows the user to create a new Deivce Profile using the Add Device Profile button.
Link Device Profiles: This right allows the user to link the profile from one account to other.
The definition of the above rights are applicable for all the other profile rights i.e.:
- Service Profile
- Connectivity Profile
- Roaming Profile
- QoS Profile
- Channel Profile
Once all rights have been set, press Add Organization to create the Organization. Once the Organization is created it will immediately become visible in the list of Organization or click on Refresh List if not loaded automatically.
Users
For accounts with User Administration rights, the Account tab is available to manage users. For normal accounts the Account tab is hidden and inaccessible.
To access the user account, select Manage Users from the Accounts dropdown menu. This will show the list of all users of the current users.
The users list shows the basic rights for each user, i.e. does the user account have rights to register devices and is the user account an administration account. Please refer to the Organisation section(above) for the explanation of the rights.
It is recommended to use email style user account names, as the name must be unique across the entire network.
Customers
The Customers view is available only to accounts that have Customer Admin rights. For all other accounts, the Manage Customers tab item is hidden and inaccessible.
To access the view, select Manage Customer from the Accounts dropdown tab. This will show the list of customers on the system.
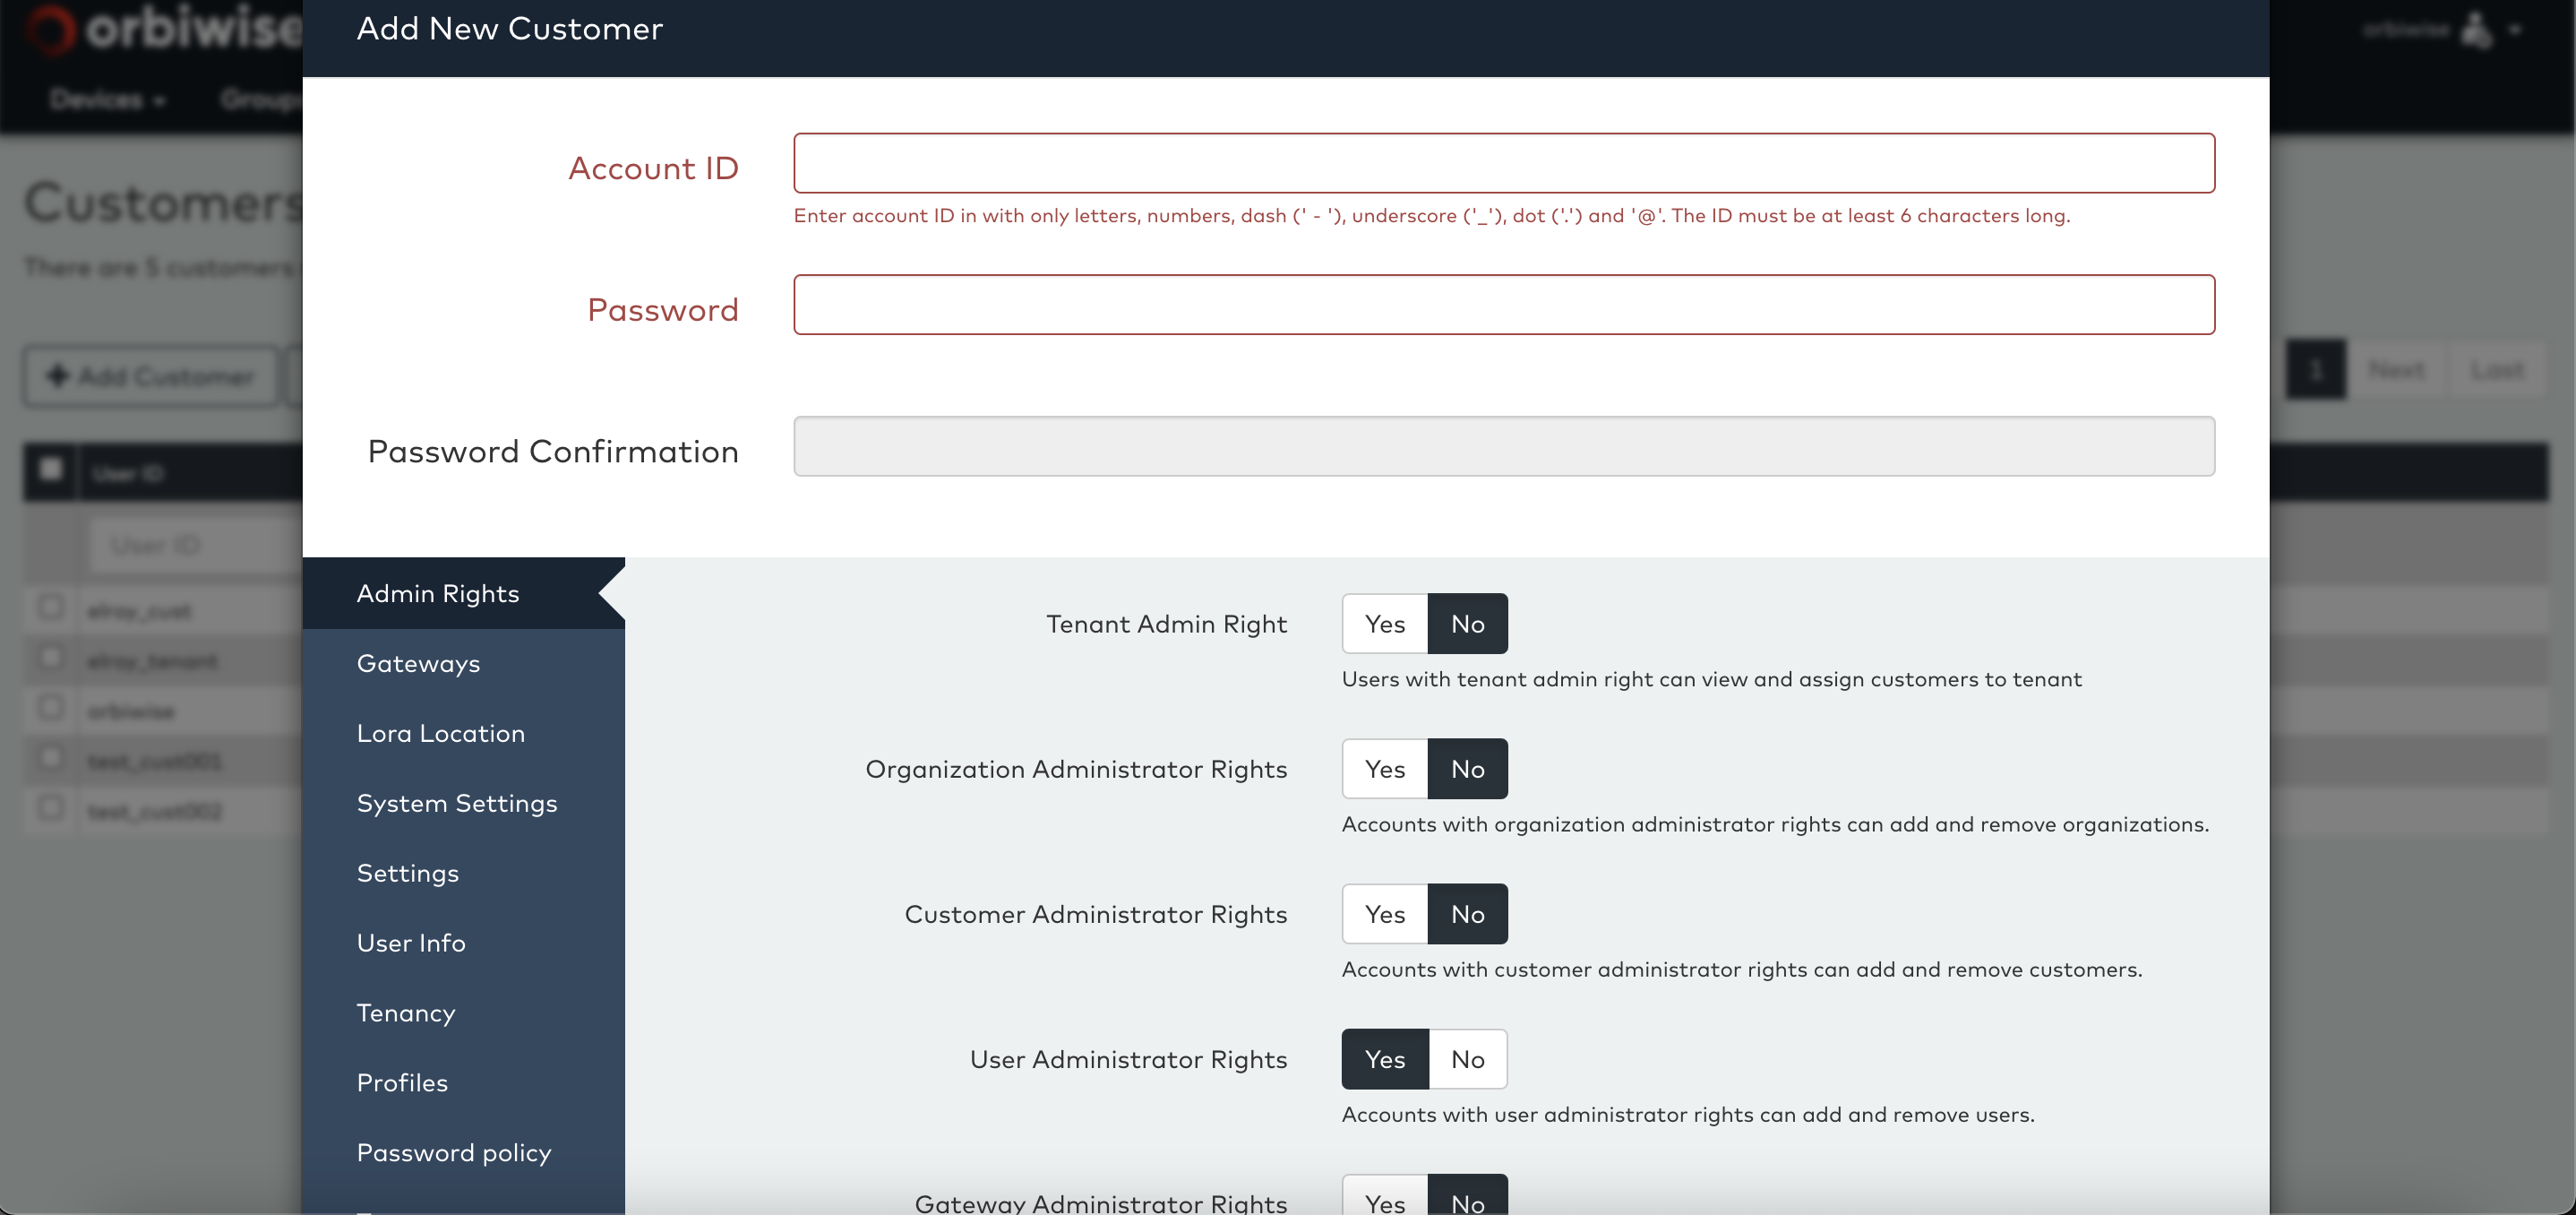
Pressing the Add Customers button can create new customers. This will bring up a popup window to define the customer profile, see below. Please refer to the Organisation section(above) for the explanation of the rights.
There are two more tabs with additional setting for the customer.
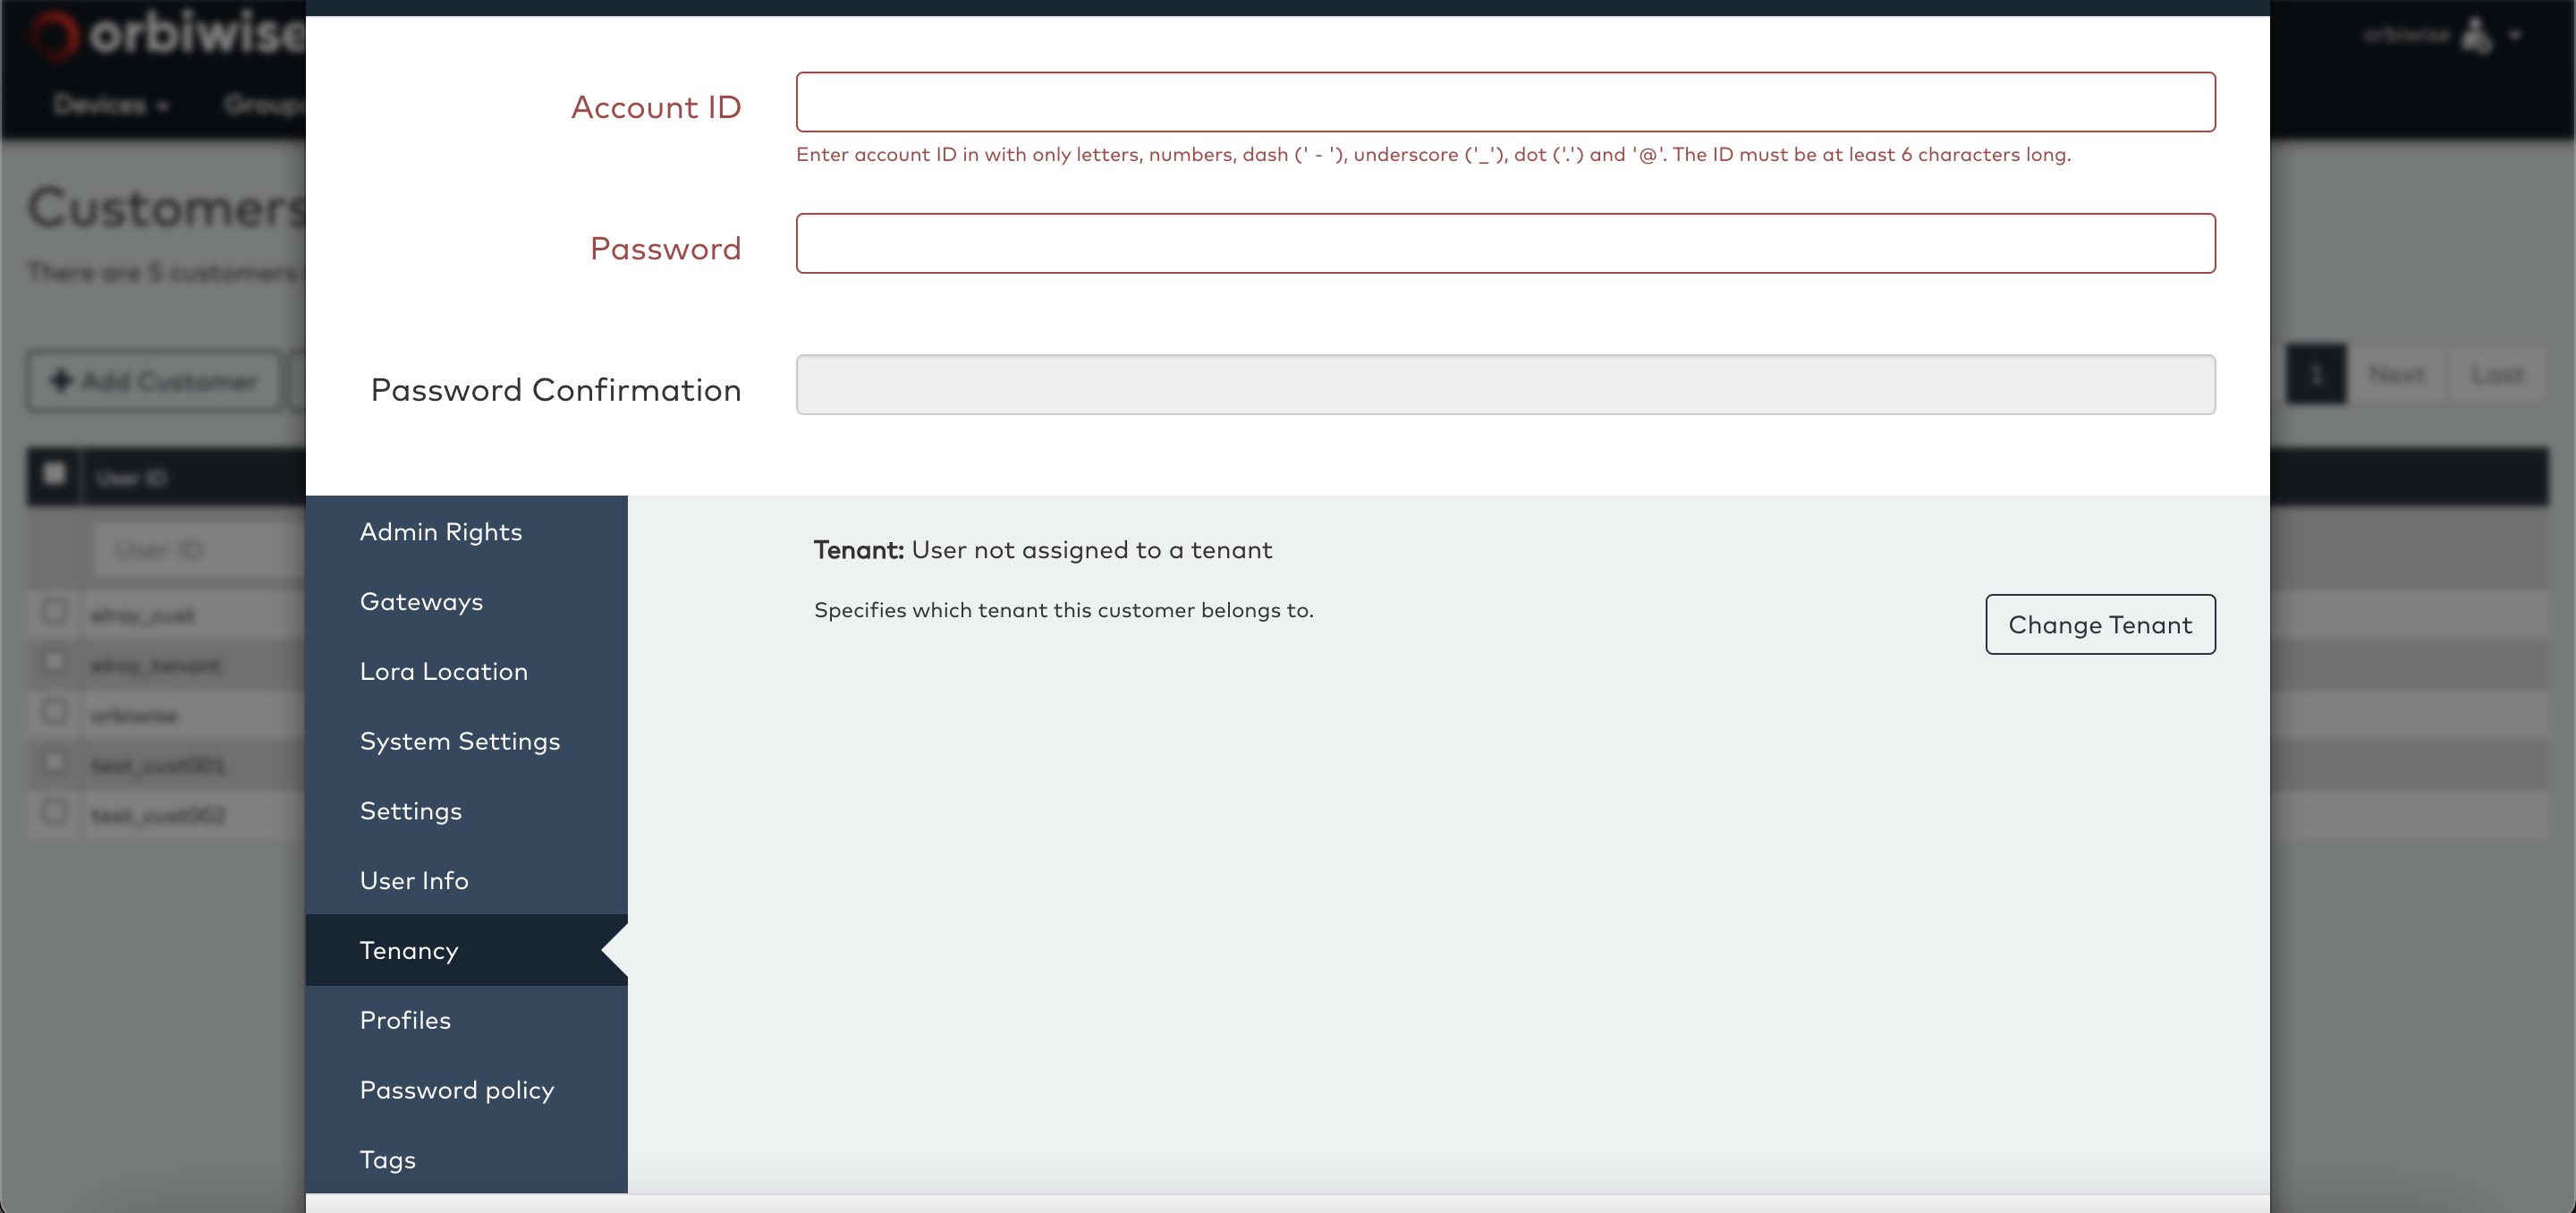
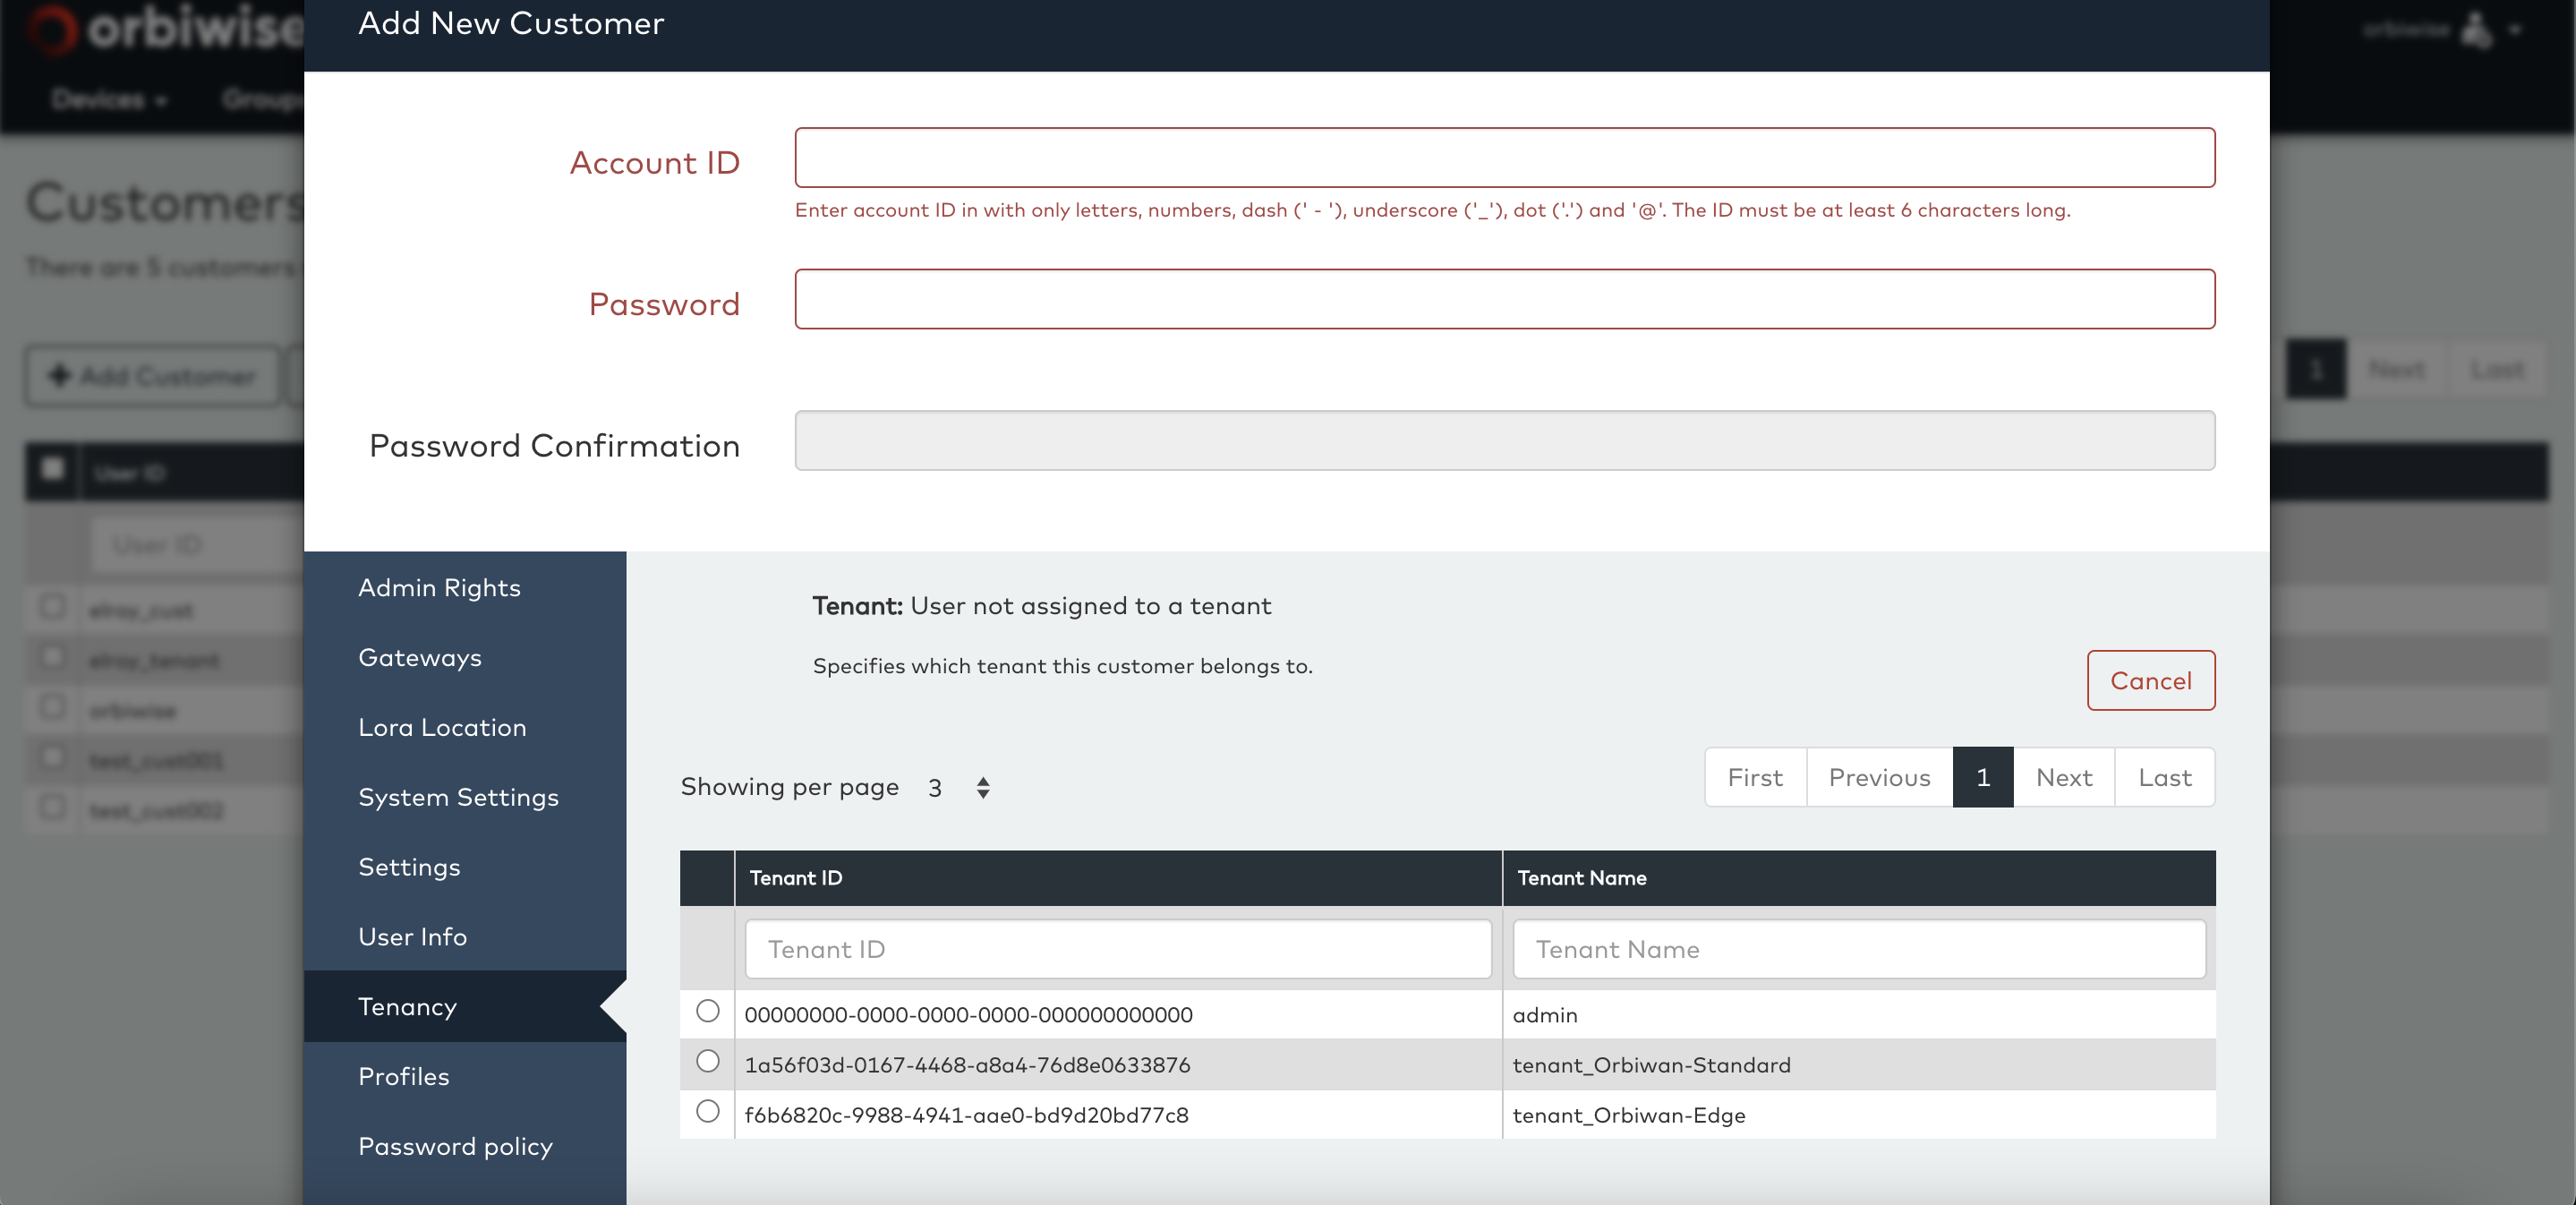
The first is the Tenancy tab. This tab is used to associate a new customer with a Tenant defined in the NST. A Tenant in this context is a kind of virtual operator who is able to operate a sub-network on the same global network. Tenants typically add their own gateways that only tenant users have rights to use.
Click on Change Tenant button on the Tenancy tab to see a list of available tenants.
Note: Only accounts that have Tenant Admin rights are able to see the tenancy tab and assign tenancy to a newly created customer account.
All new accounts created from an account belonging to a tenant will automatically inherit the same tenancy. An administration account (with customer admin level) but without tenant admin rights will be able to see only accounts that belong to the same tenant. All other tenants will be invisible and it will look to the tenant as if it is sole tenant of the network.
Customer accounts also allow to specify the password policies. On the Password policy tab it is possible to enforce different password policies for the user accounts created on the customer account.
Two different policies can be selected for users that have plain user rights (i.e. non-admin users) and for user that have elevated rights (i.e. admin rights). This is typically used to enforce a stronger password for administrator accounts with requiring complex passwords for plain users. It is also possible to specify a set of password policies for application accounts.
See picture of the password policy settings below:
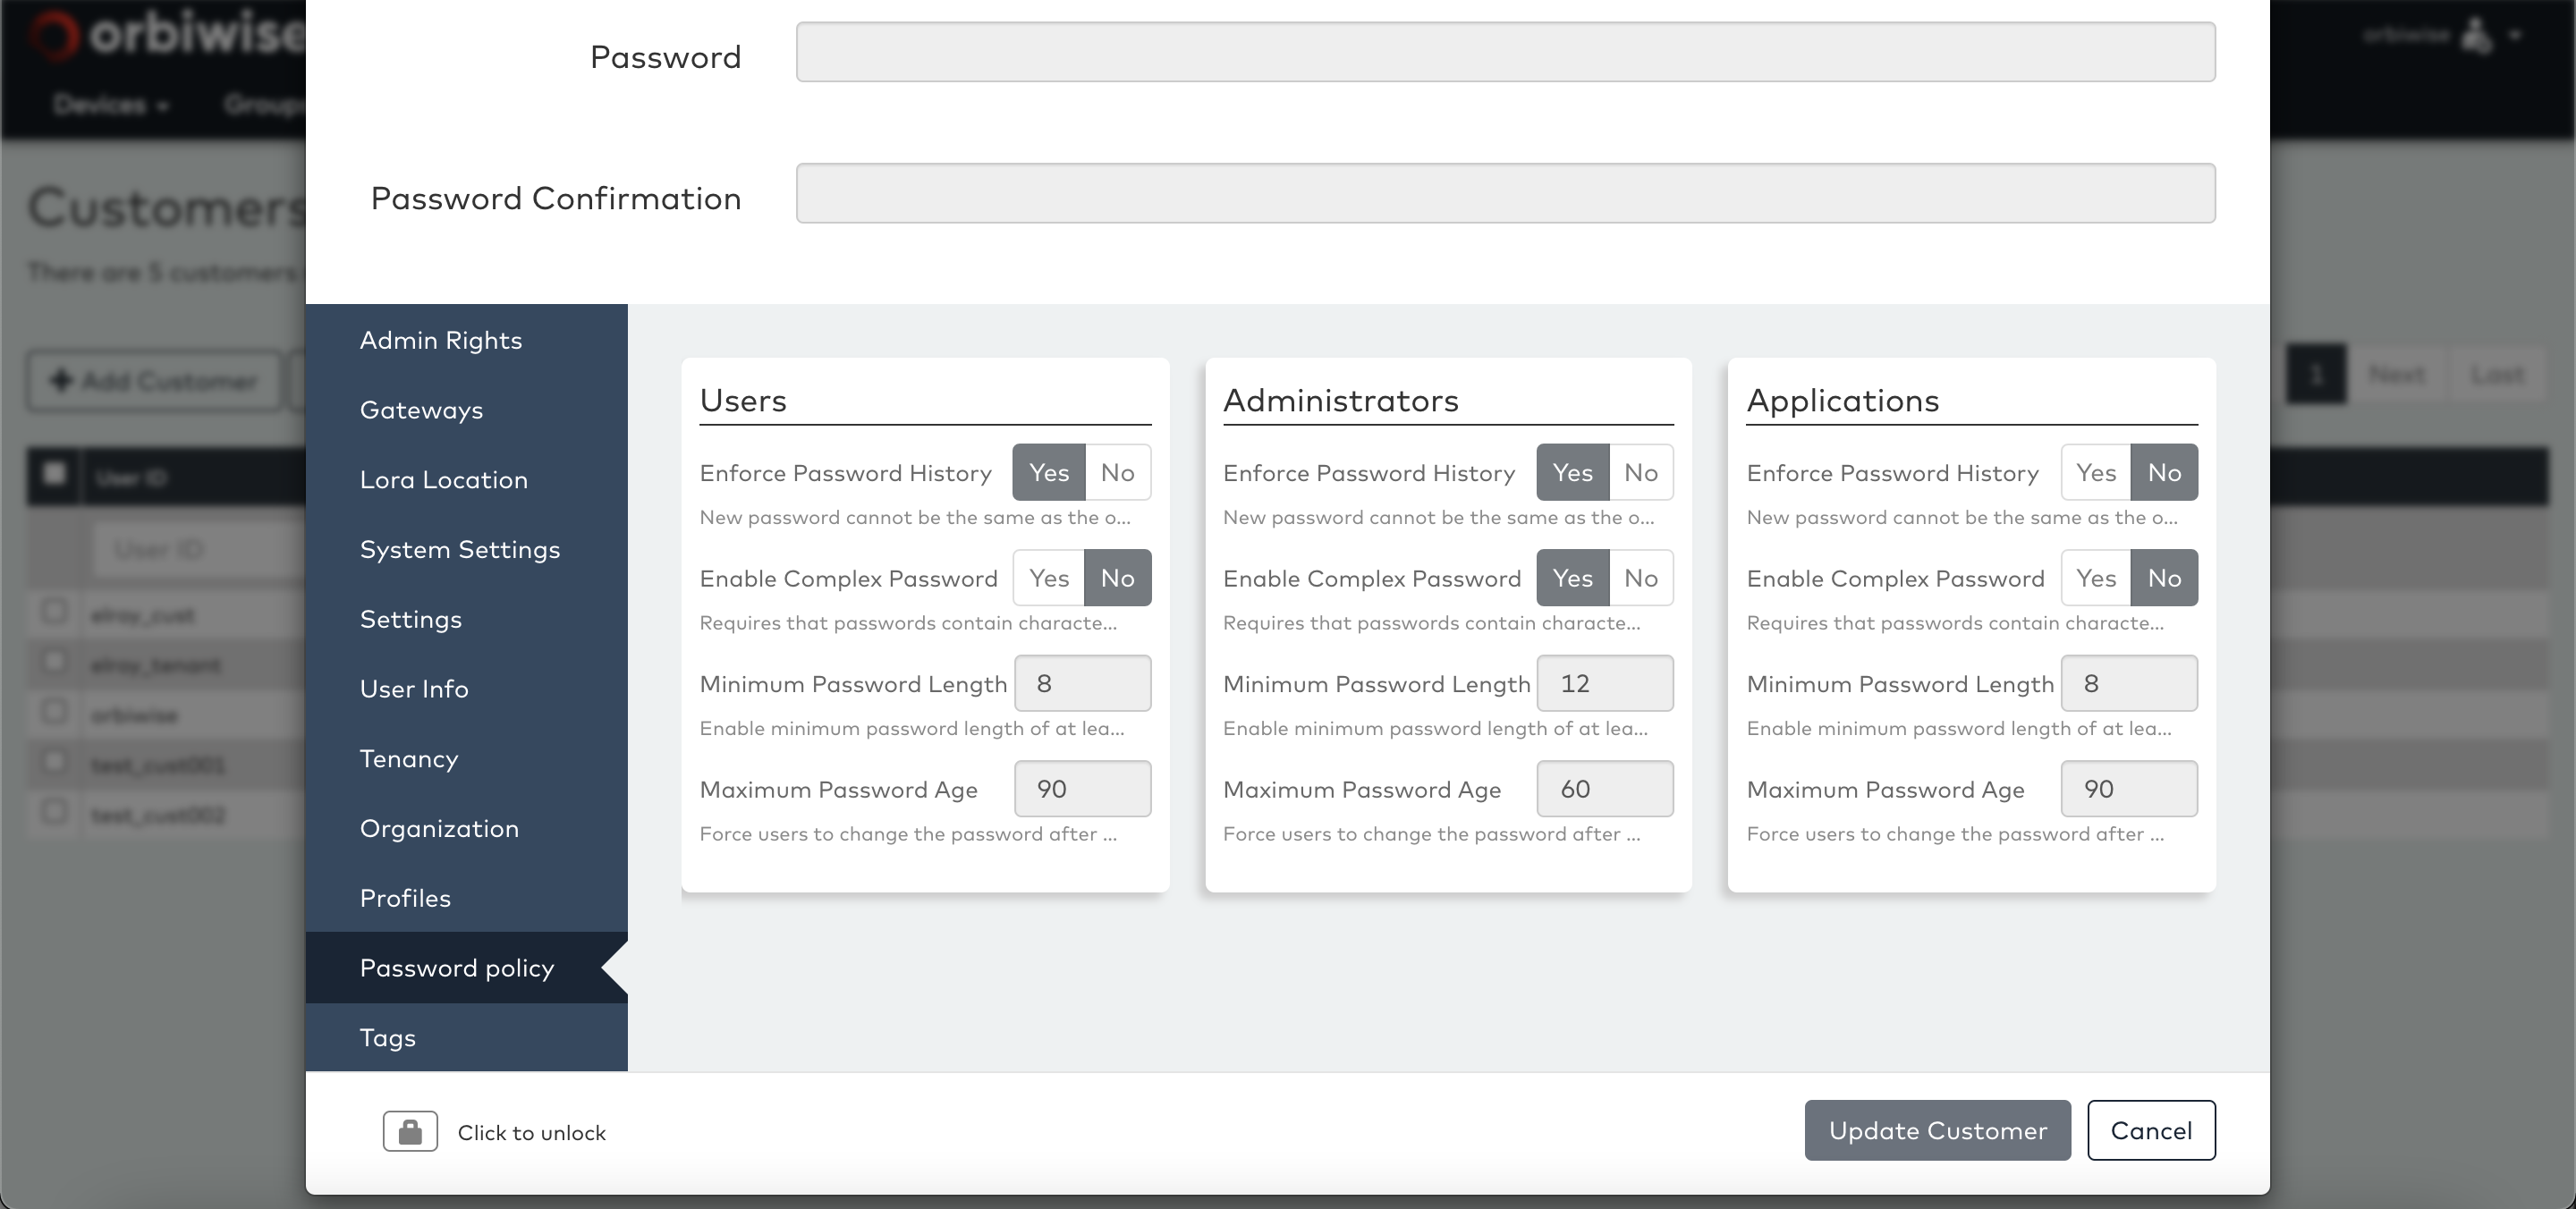
Note: When nothing is specified, the password policies will use the default policies for the instance.
It is recommended to use email style user account names, as the name must be unique across the entire network.
Administration and “Sign-In Forwarding”
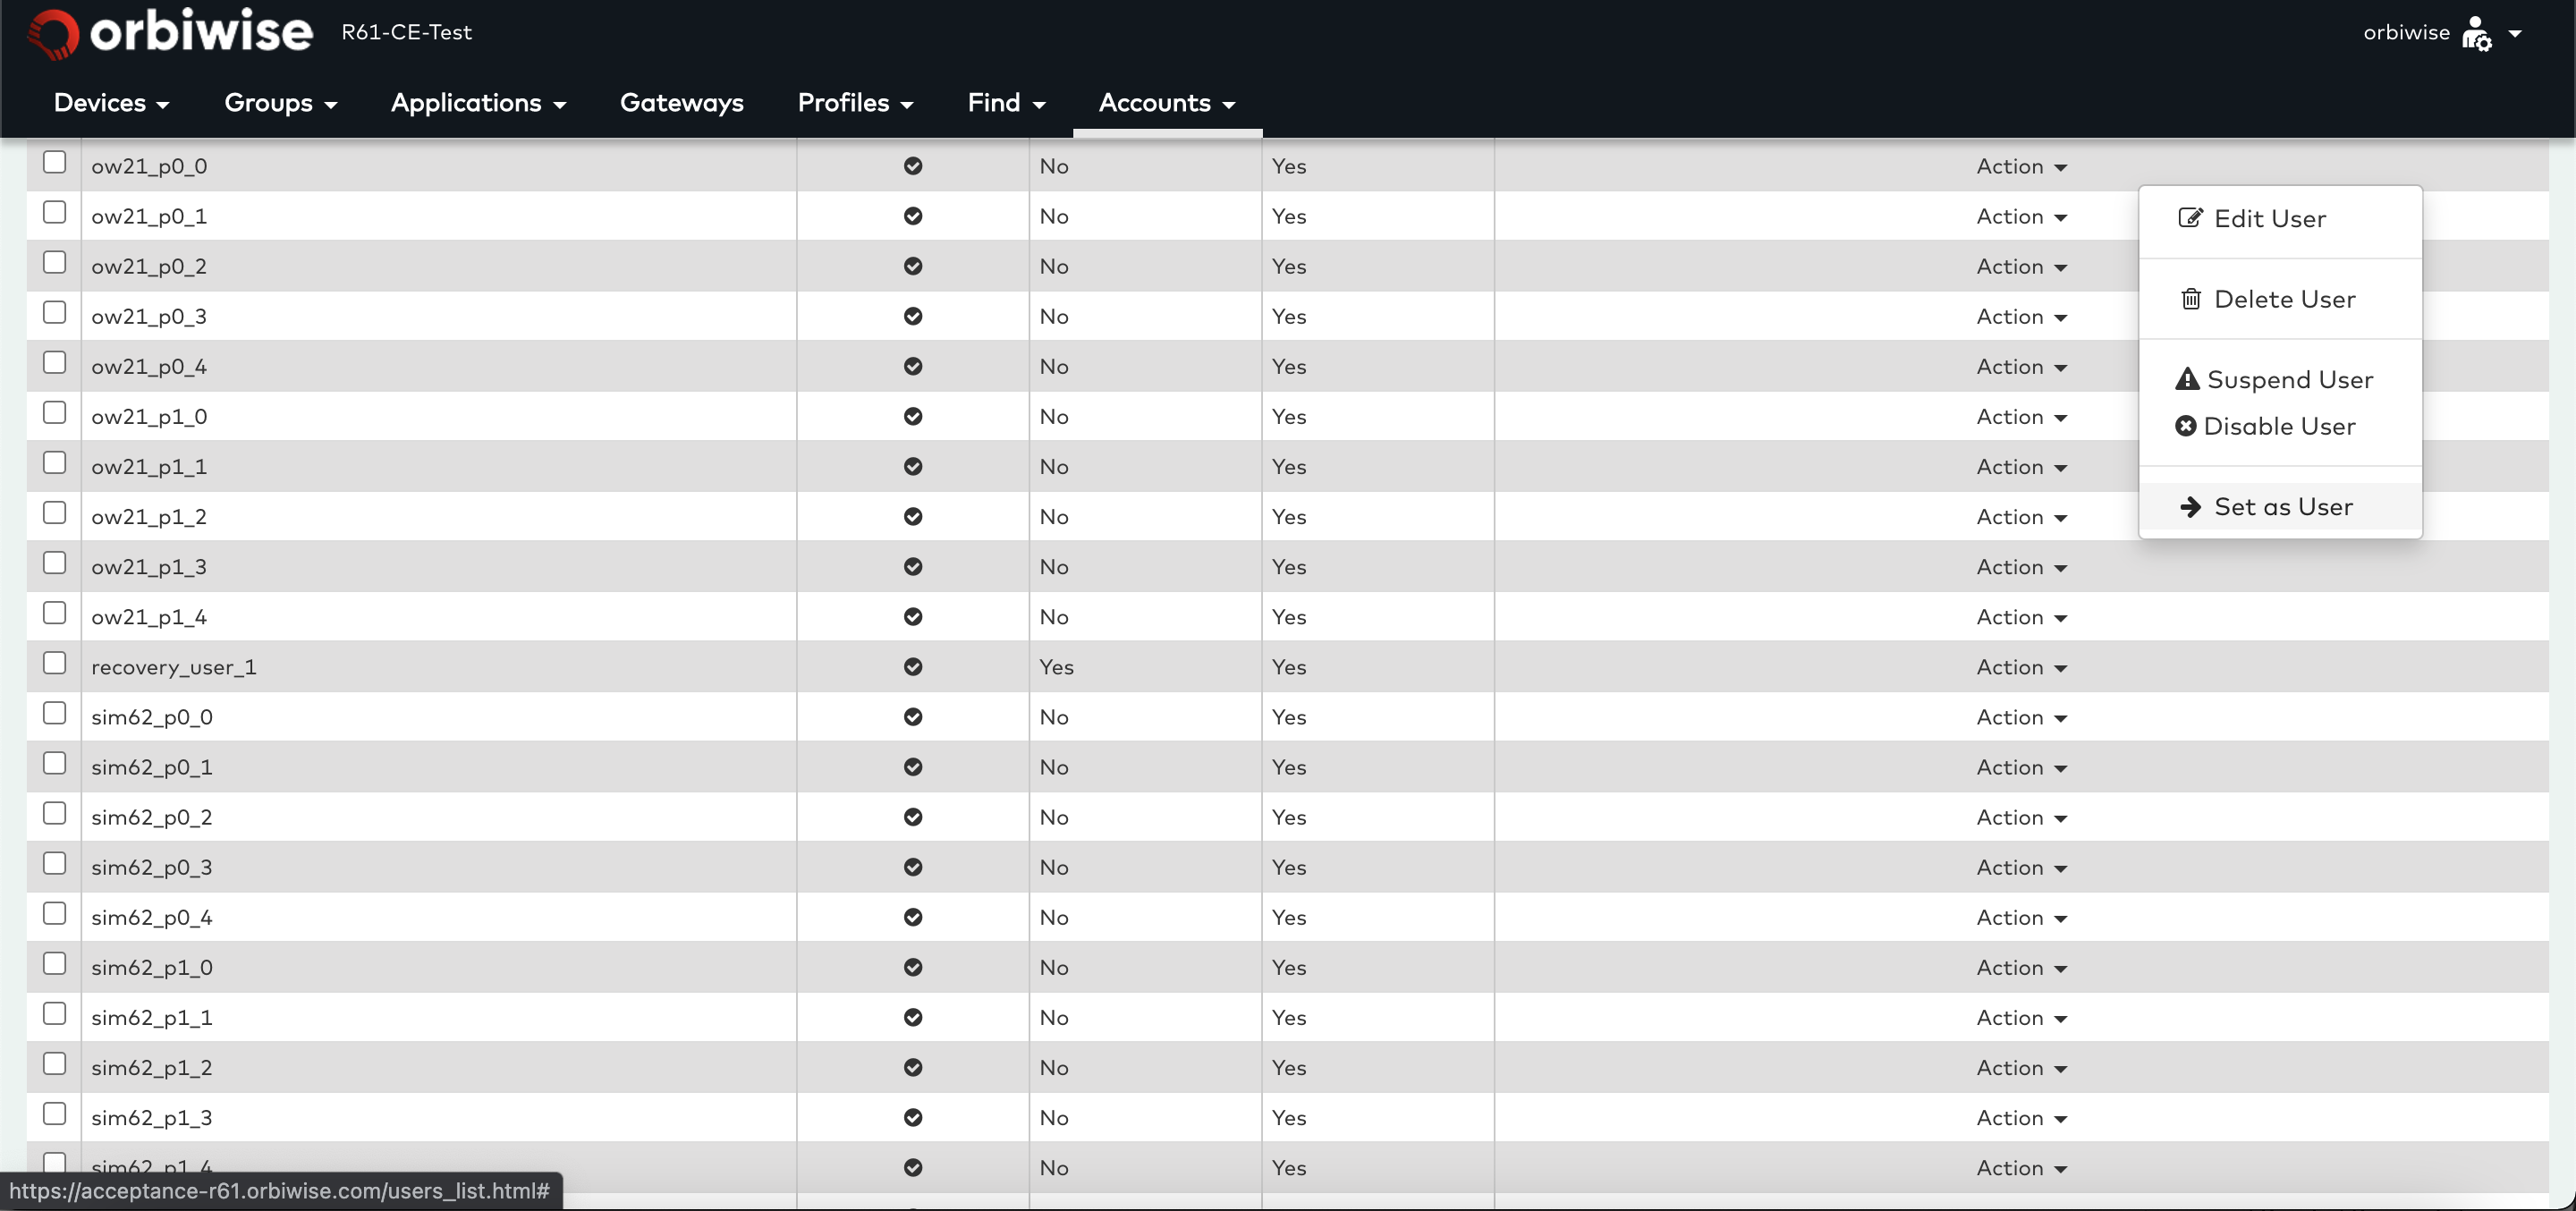
For an administrator to be able administer other users accounts (e.g. for a typical help desk situation), the administrator must be able to sign-in as another user but with elevated rights enabling it to perform tasks that the user account itself may not have the rights to do (such as adding a gateway to the account).
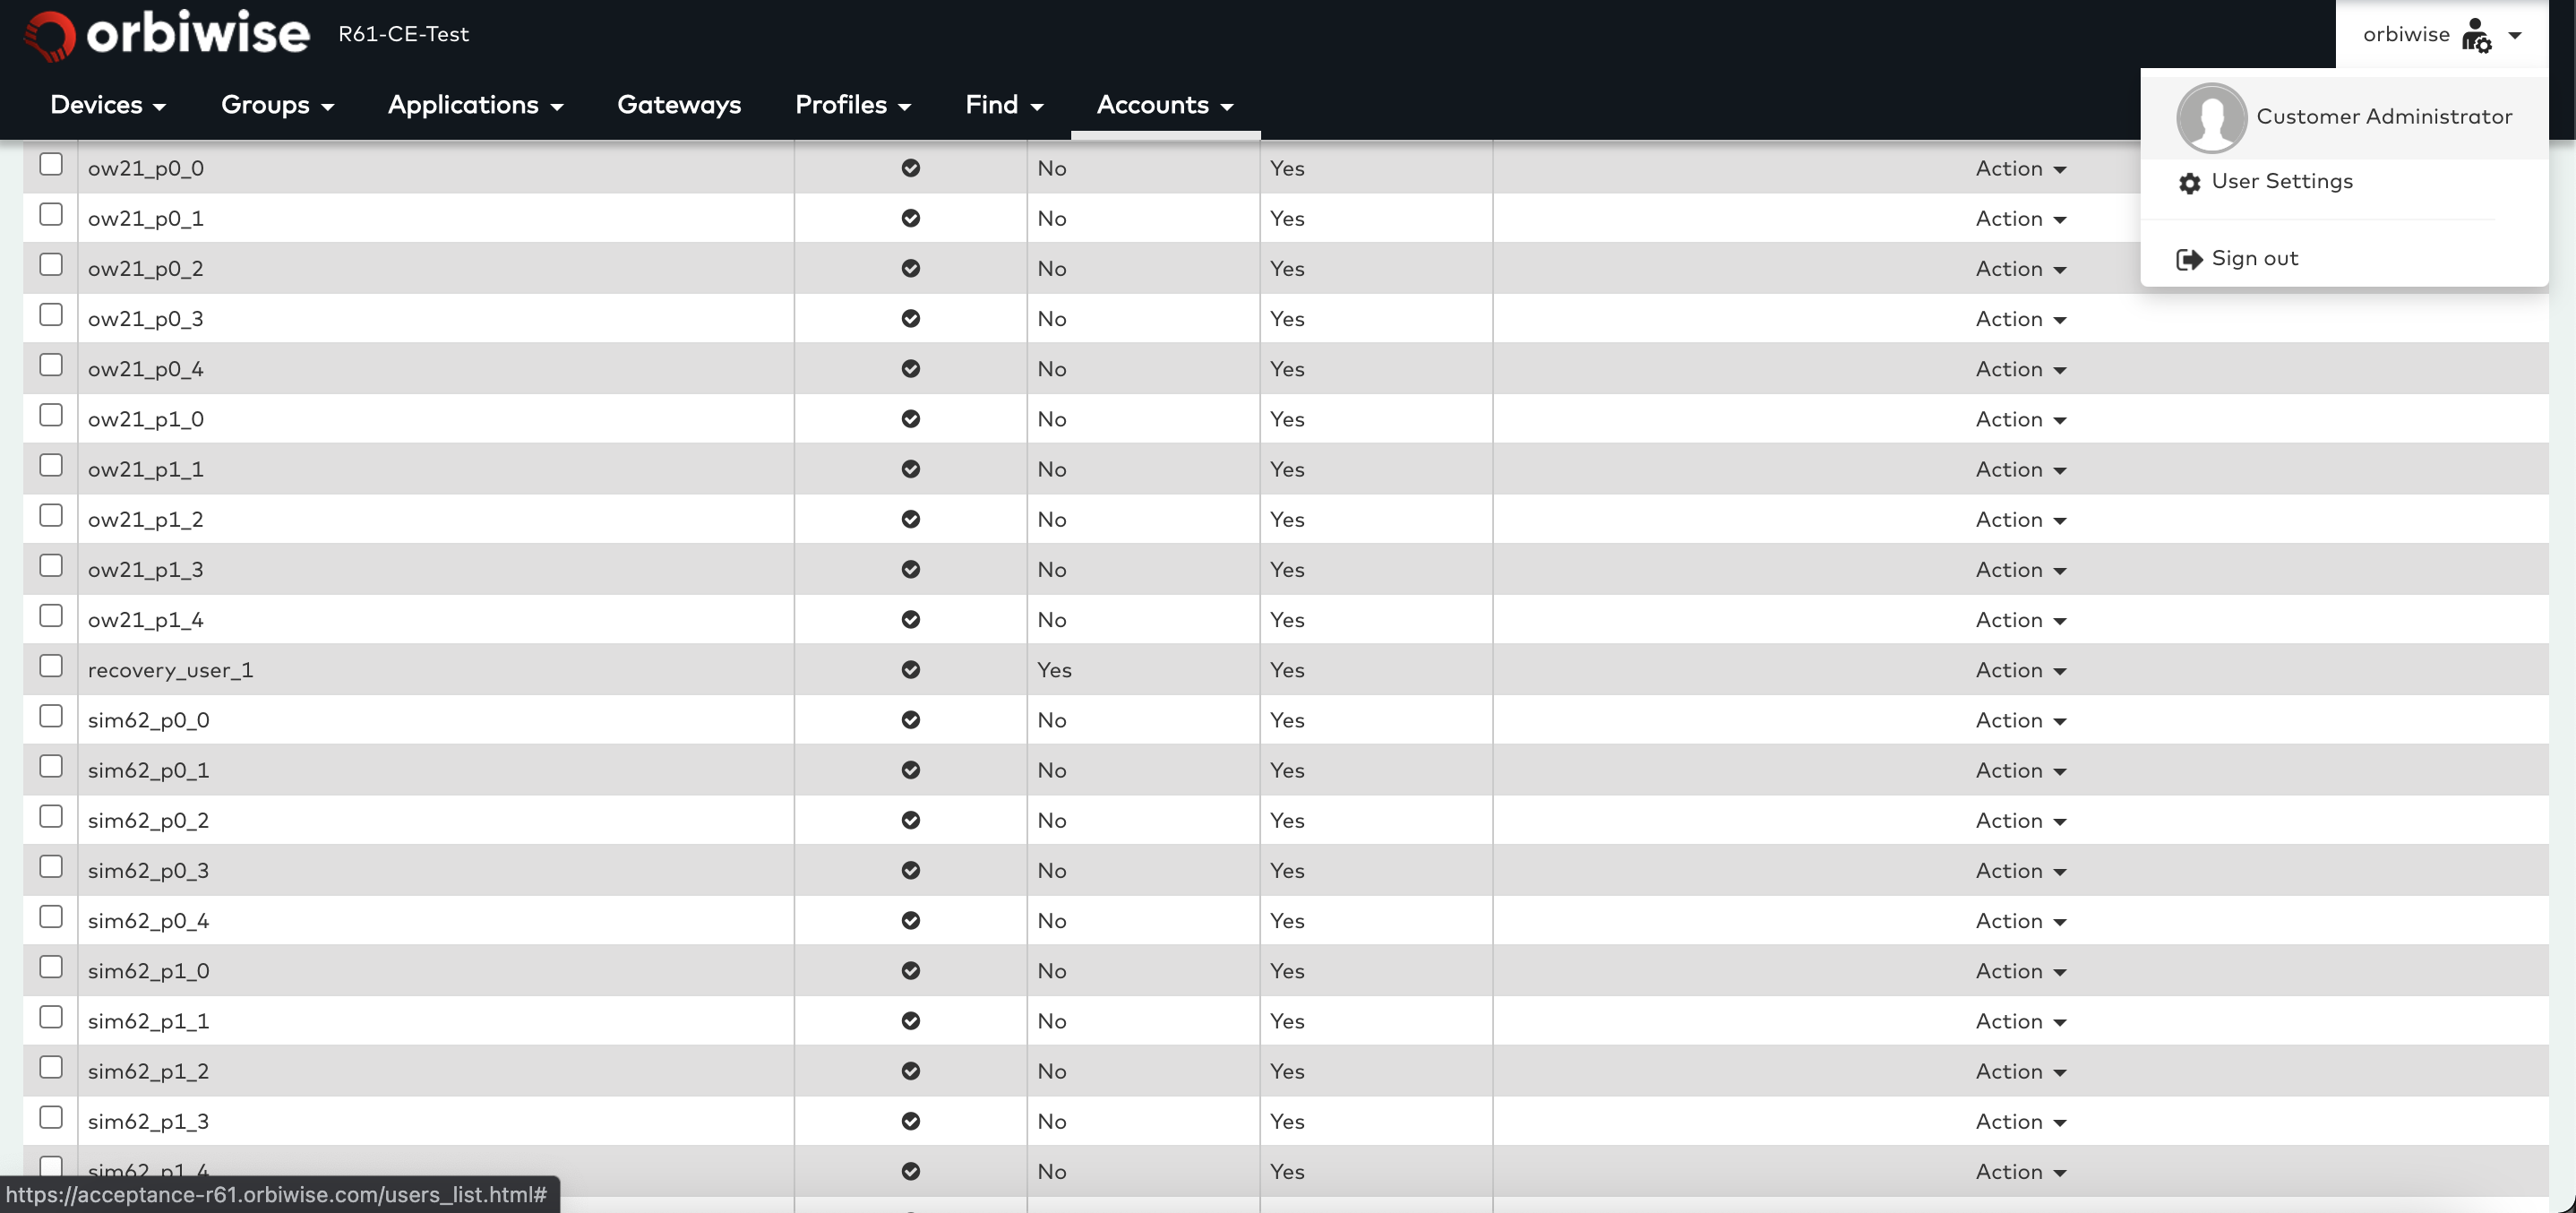
This concept is called Login or Sign-In forwarding. To access this feature from the DASS-UI is very simple. An administrator can select any user from the list of users and select Set as User from the Action dropdown tab for that user.
The current user of the DASS-UI is always shown at the top right corner as shown below:
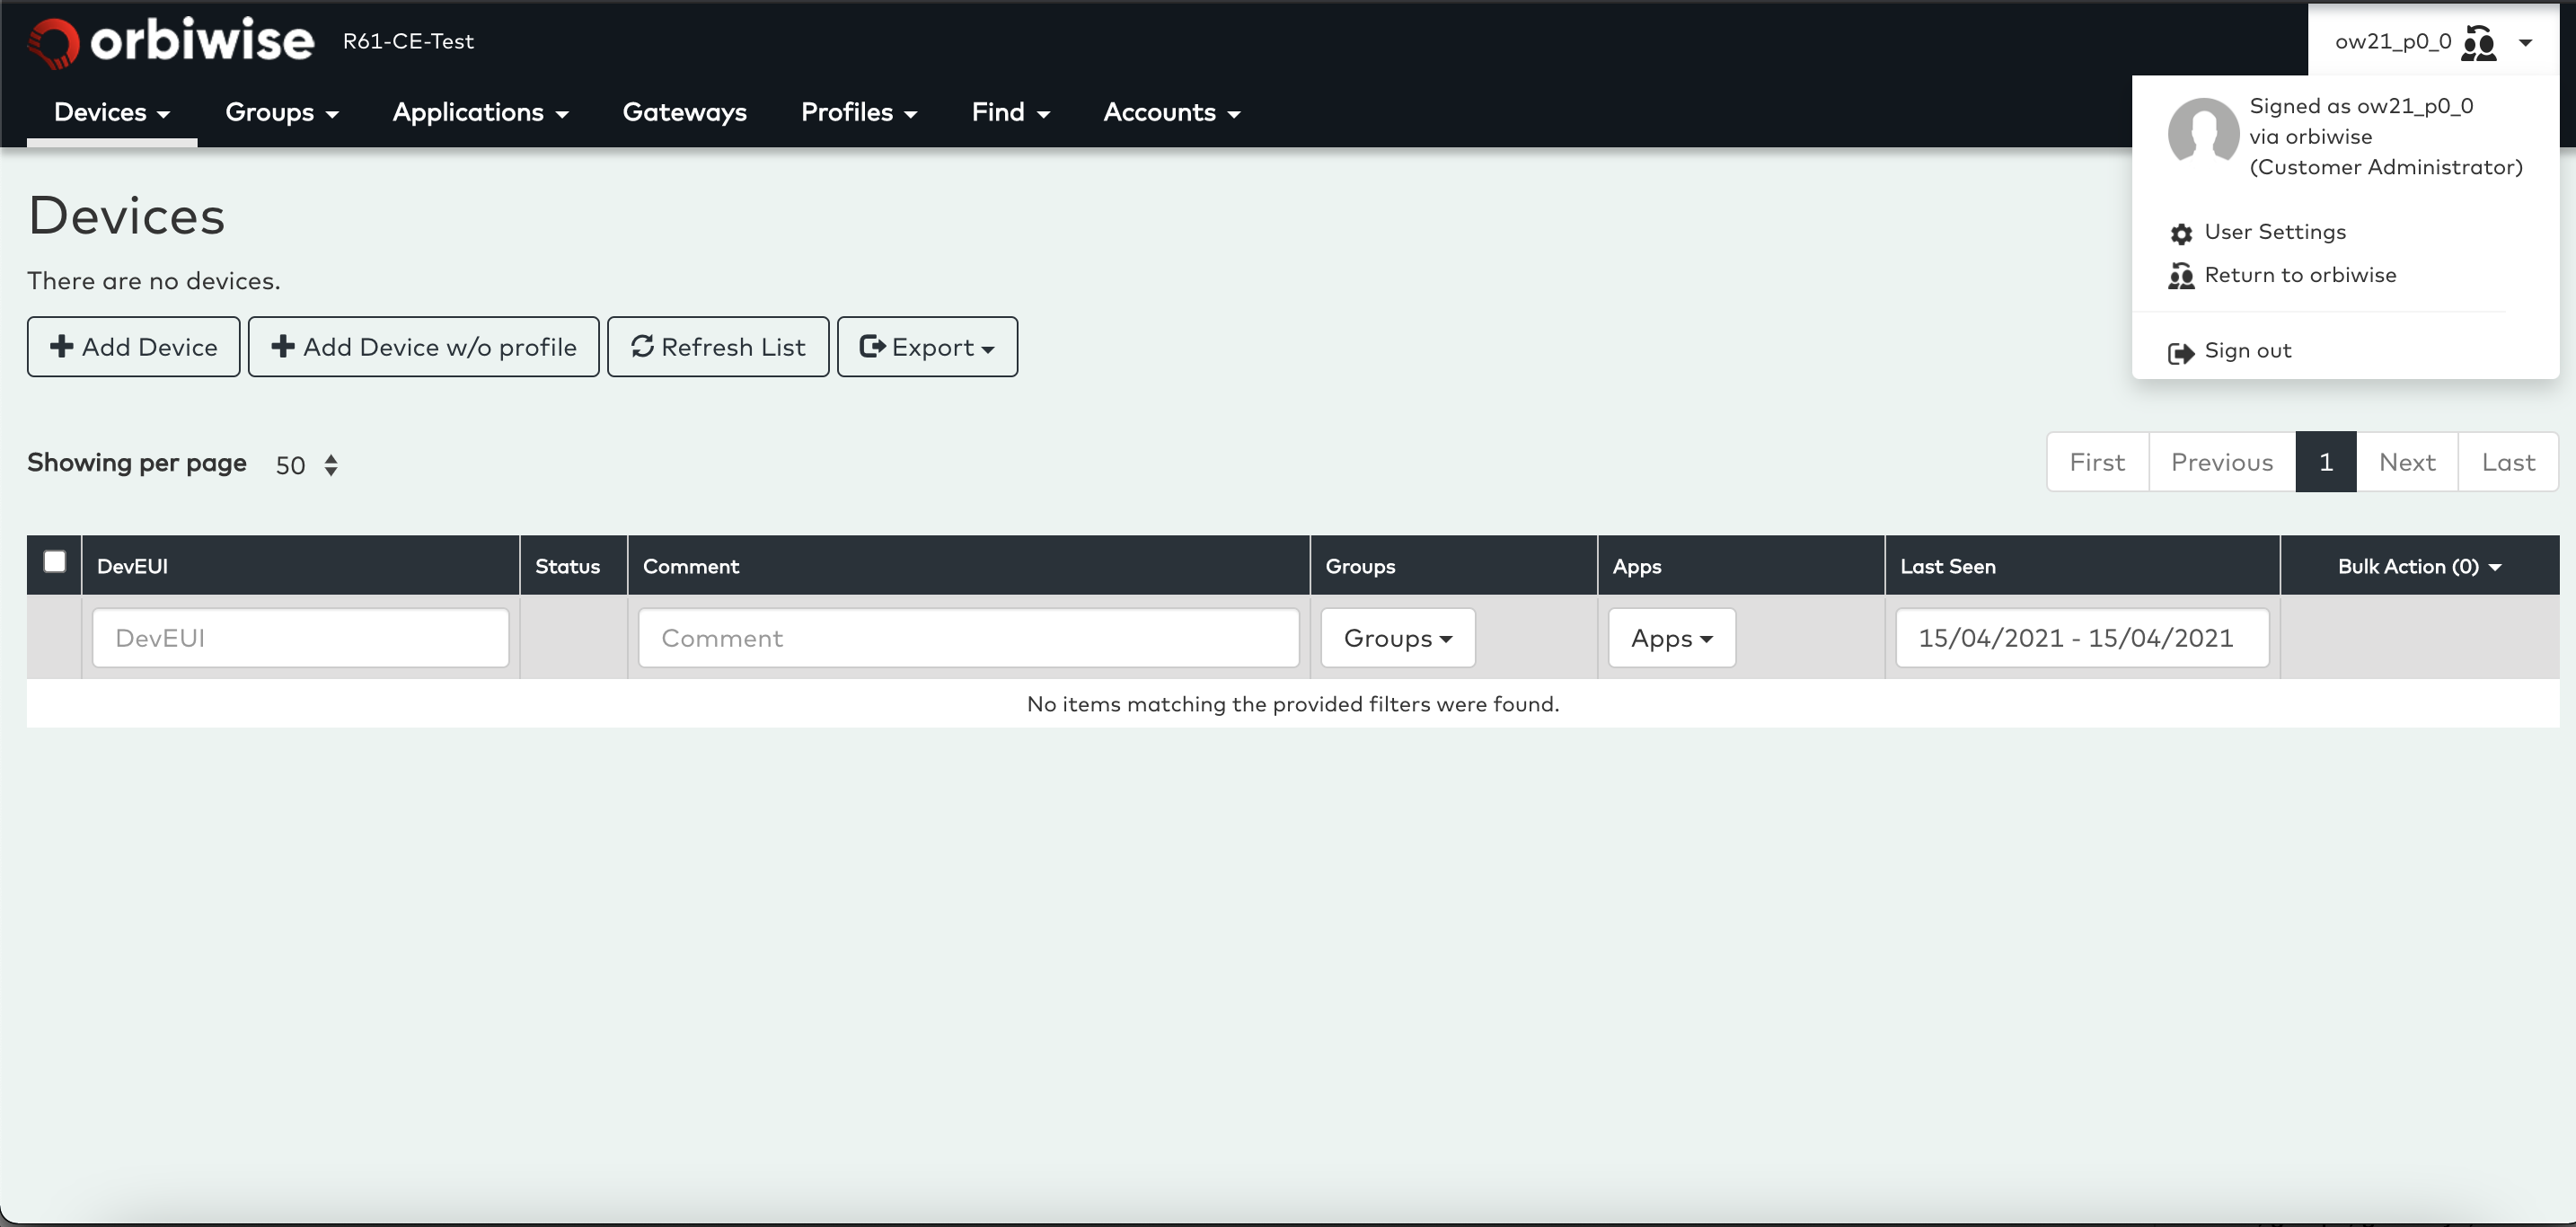
Once the sign-in forwarding is started by the Set as user command, the signed in message is changed to the new user and a message via admin-user-id as shown below:
The admin user can now use the DASS-UI as if it was signed in with the other account. But the rights level available remains that of the admin account. That means that for a user account that may not have rights to add devices and would not have the Add Device button in the Devices view, the admin user can enter the Device view of that account. The user will have the same rights the admin account itself has and the Add Device button will be there and the administrator will be able to add a device to that account.
Once the administrator is finished working on the user account under administration, the administrator clicks on the Return to admin-user-id from the dropdown menu in the top right corner. See below:
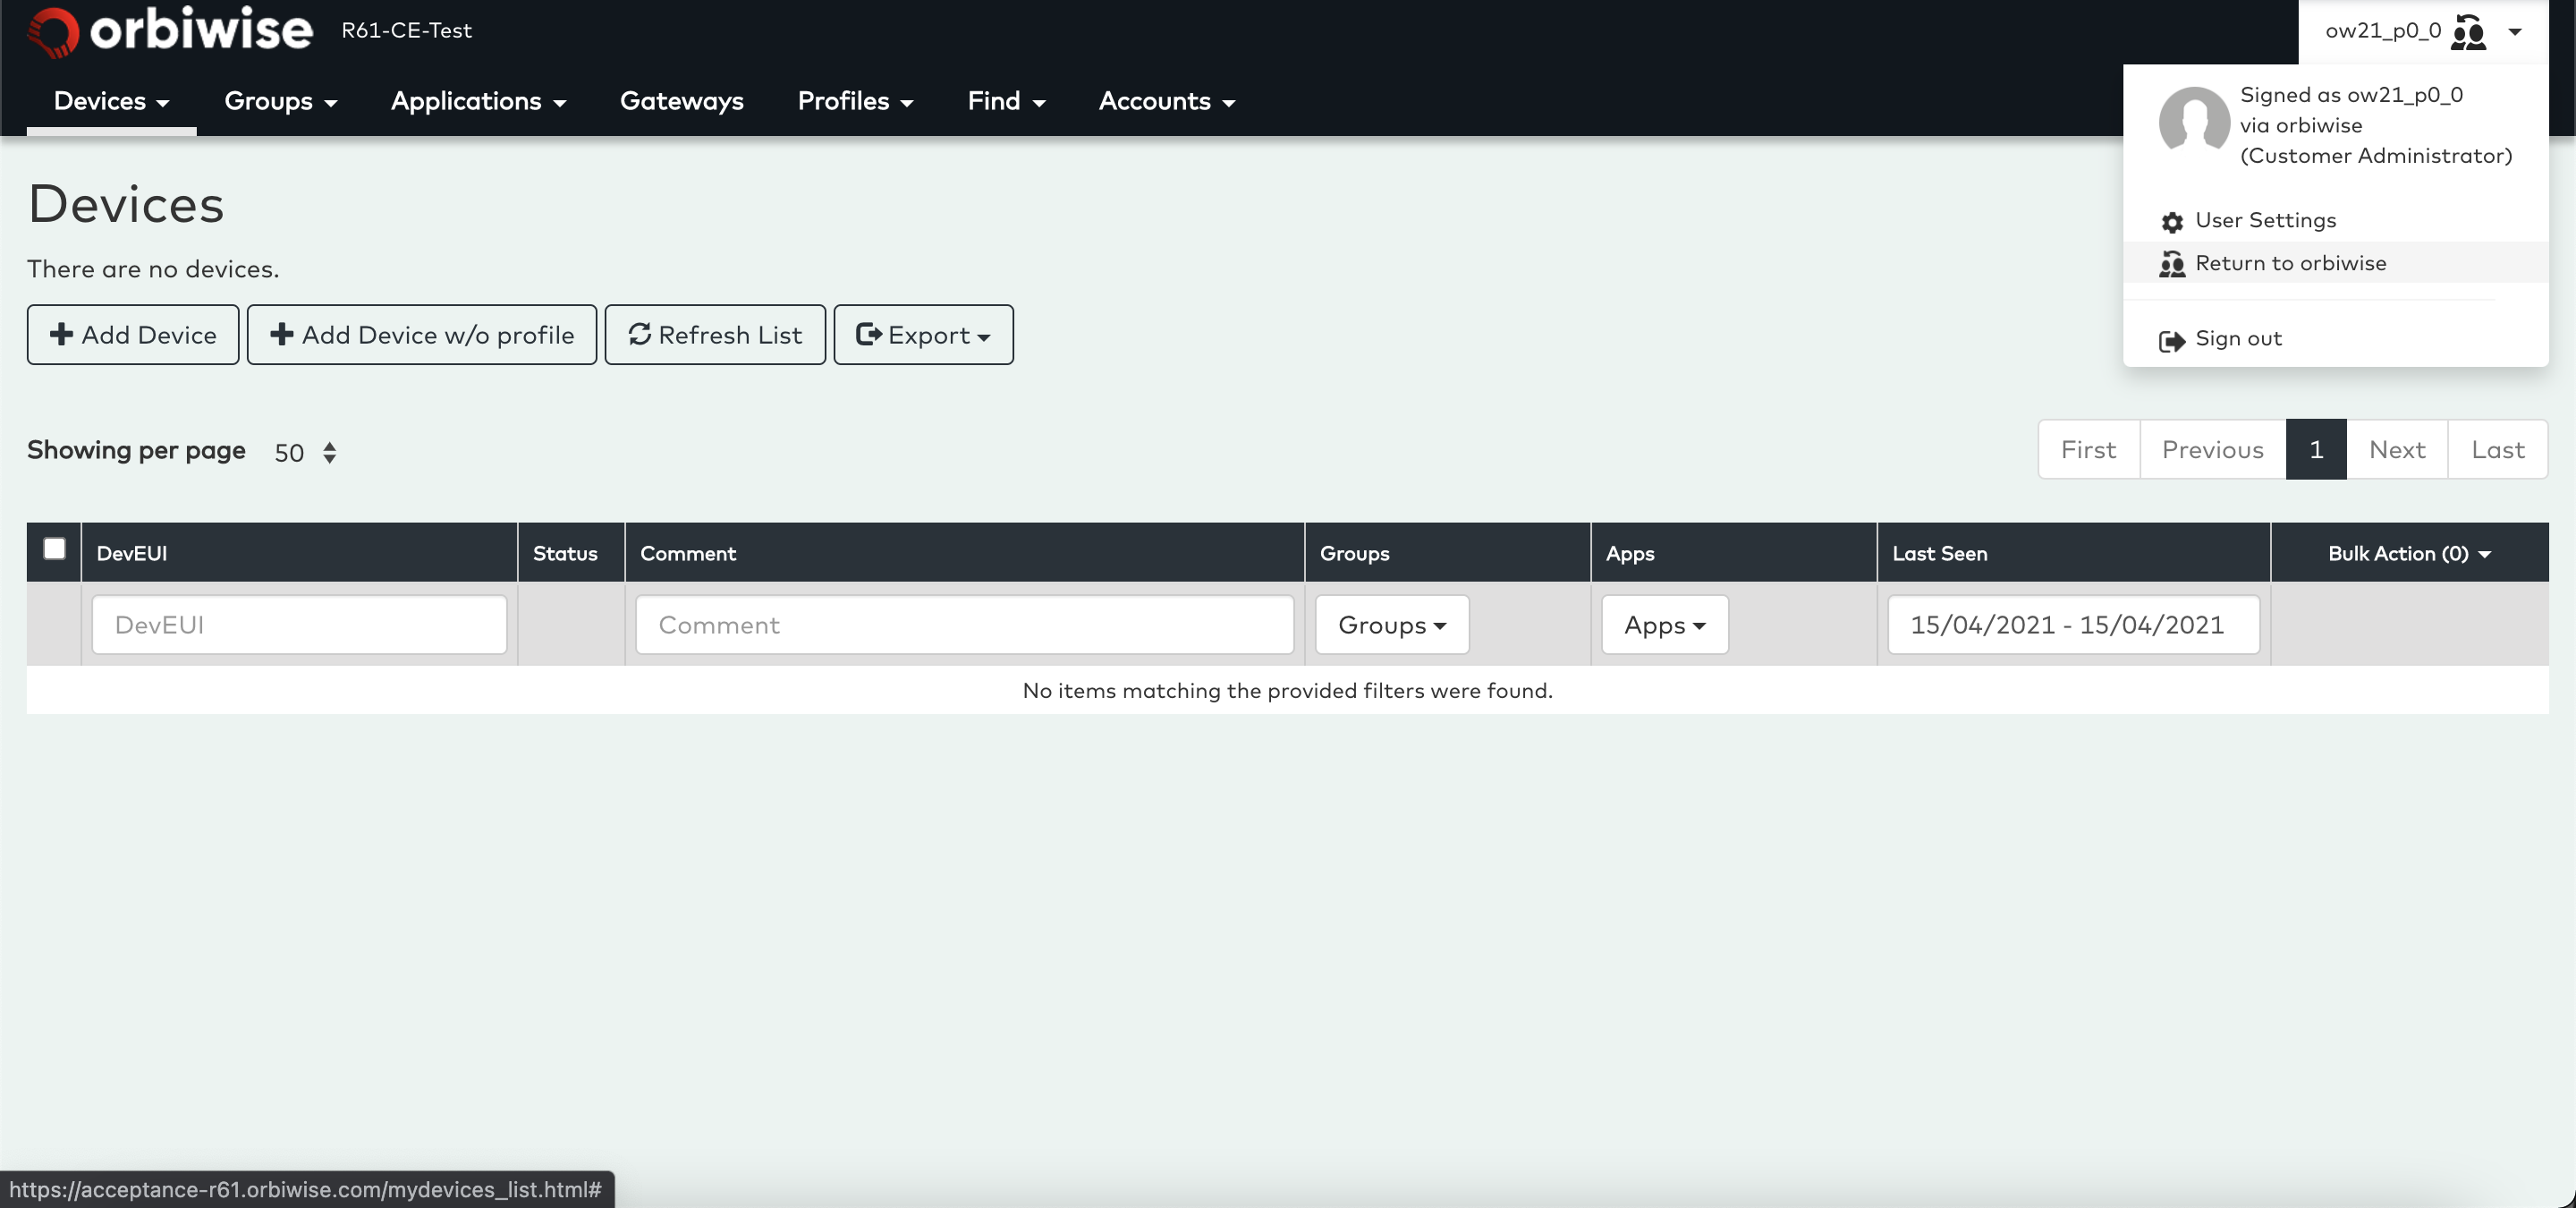
This will be the sign in back to the admin users’ own account.