Getting Started
This simple guide will help you get started with OrbiWANTM. There are five simple steps to be followed:

Login
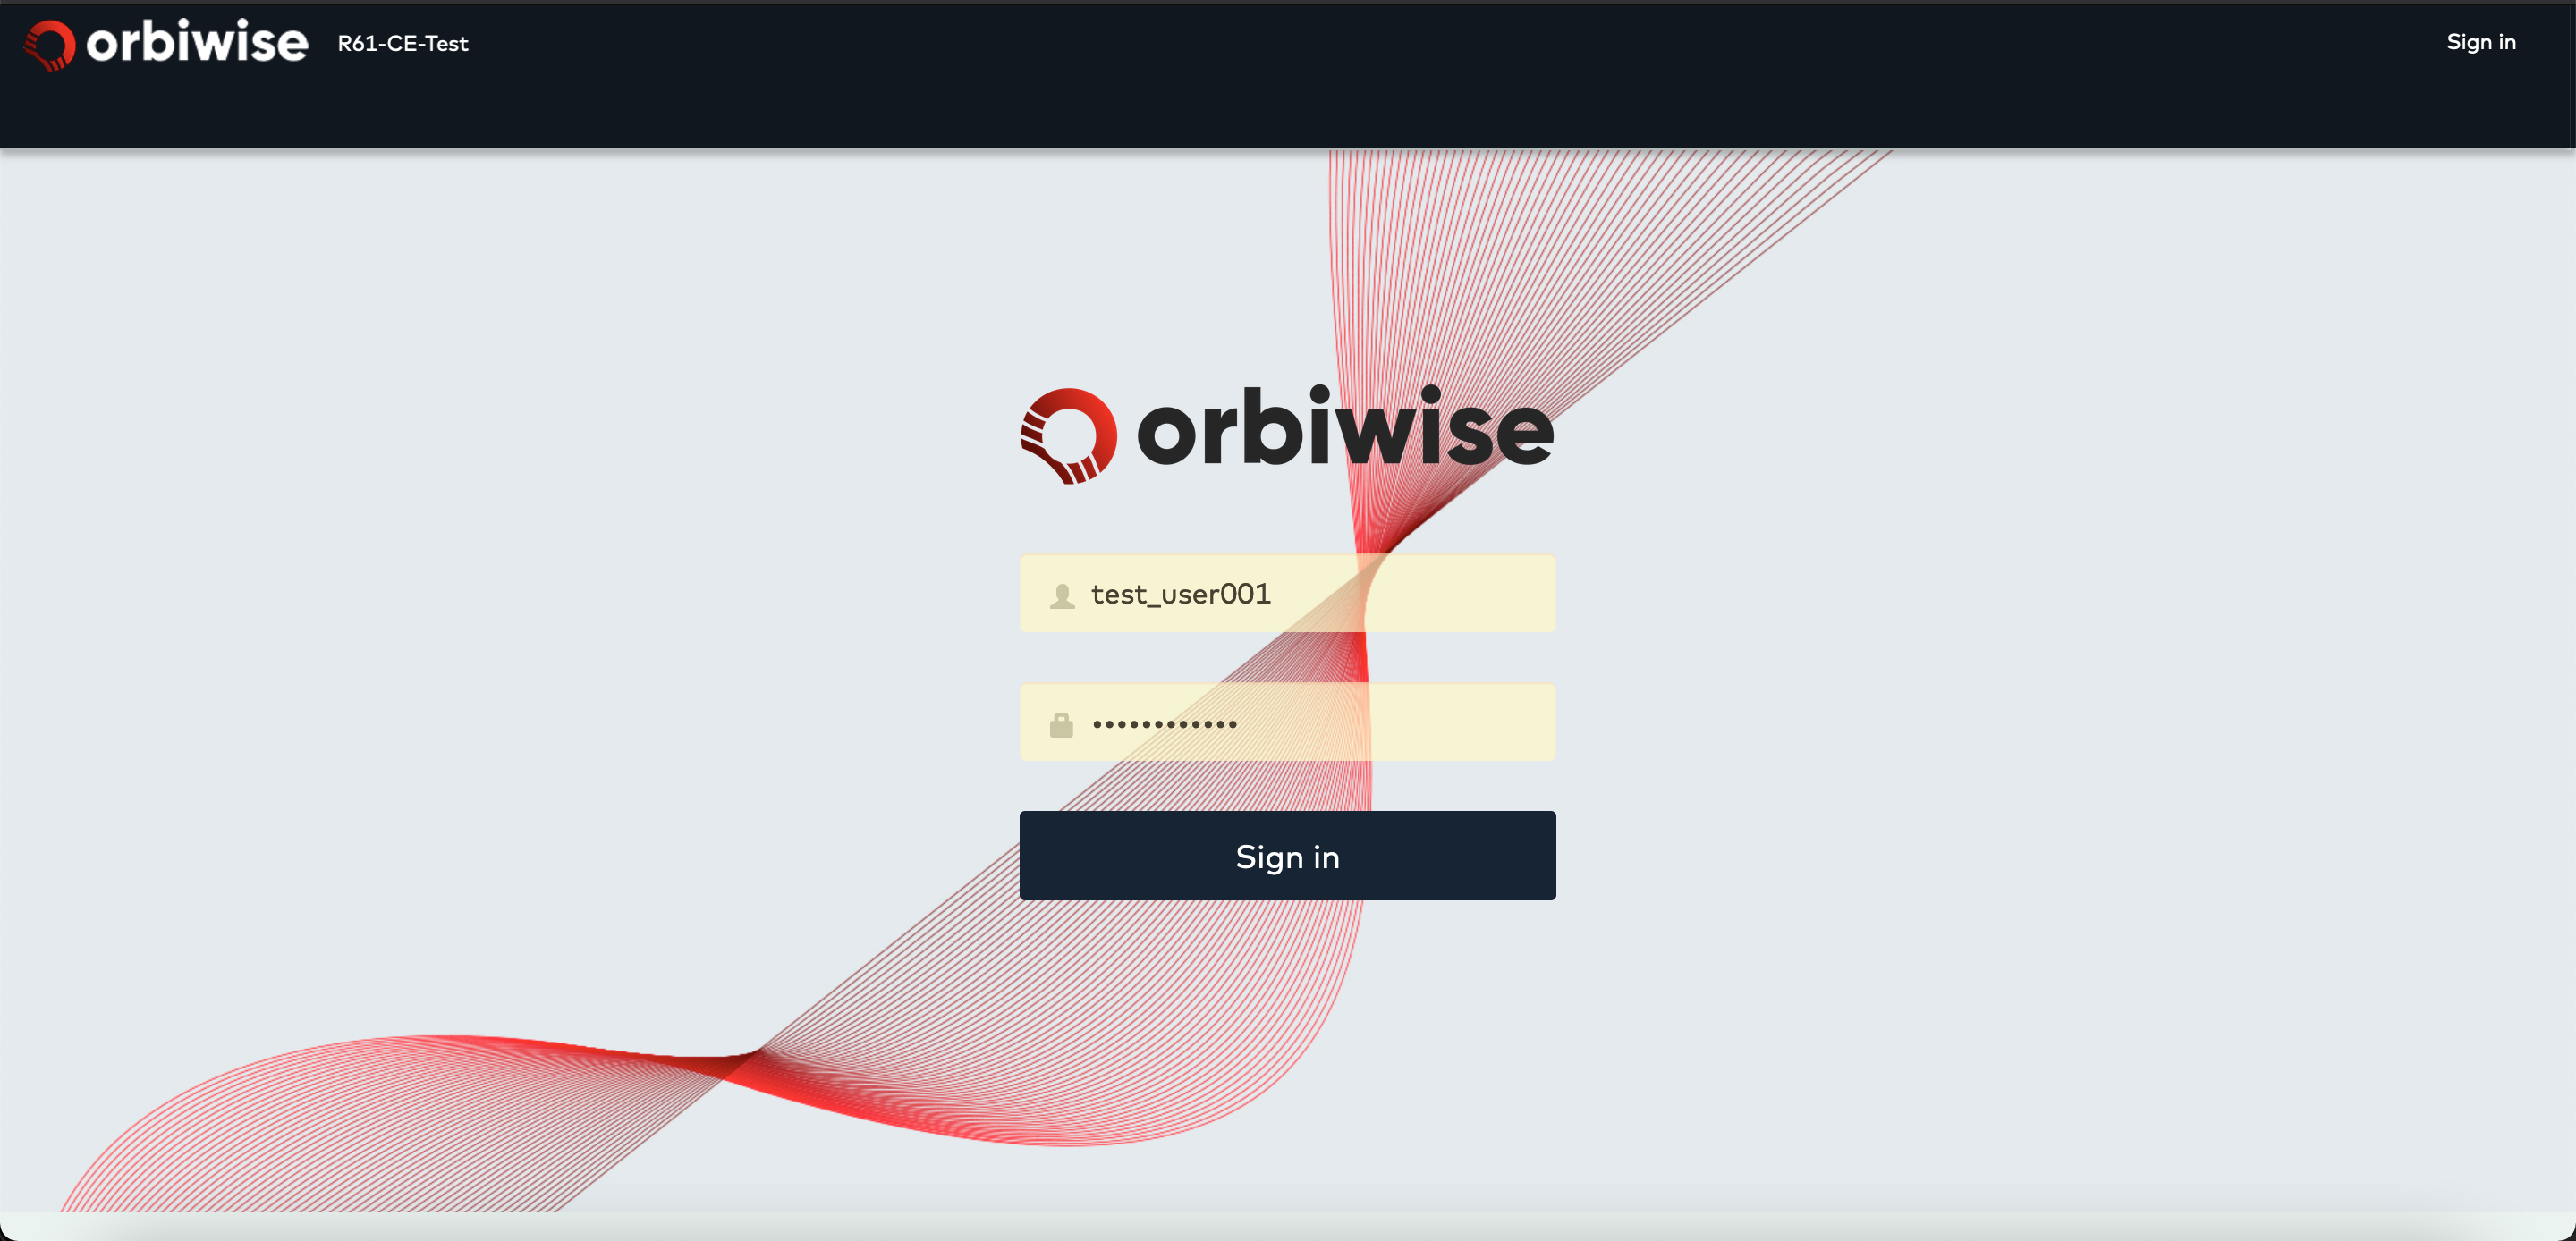
After the signup, you must have received an email with a one-time-usable-link to create your password. You can login on the instance URL mentioned in the email.
The following screenshot shows how the login page looks like:
Once you Sign in, you will see the Welcome page of OrbiWAN with the applicable menu, as shown in the image below:

Add Gateway
In order to register your gateway(s) on the applicable OrbiWAN instance, Please follow the below video
Add Device
The Next step after registering your gateways is to register your devices. The devices can be registered via as OTAA (Over The Air Activation) or ABP (Activation by Personalization) activation mode.
Below are the steps to add a device to your account:
- Navigate to Devices –> Manage Devices –> Add devices.

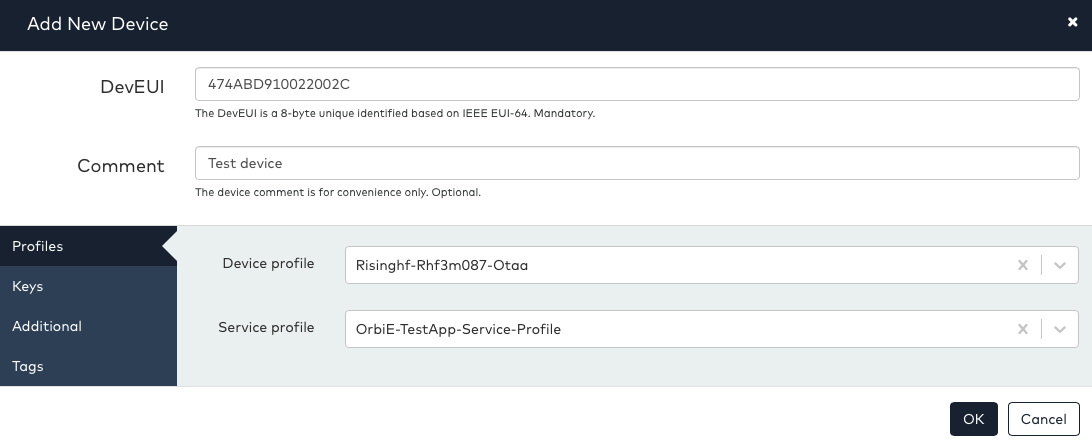
- An Add Device window will popup, enter the DevEUI, and an optional Comment.
- Select the Device Profile and Service Profile from the drop-down menu as seen below:
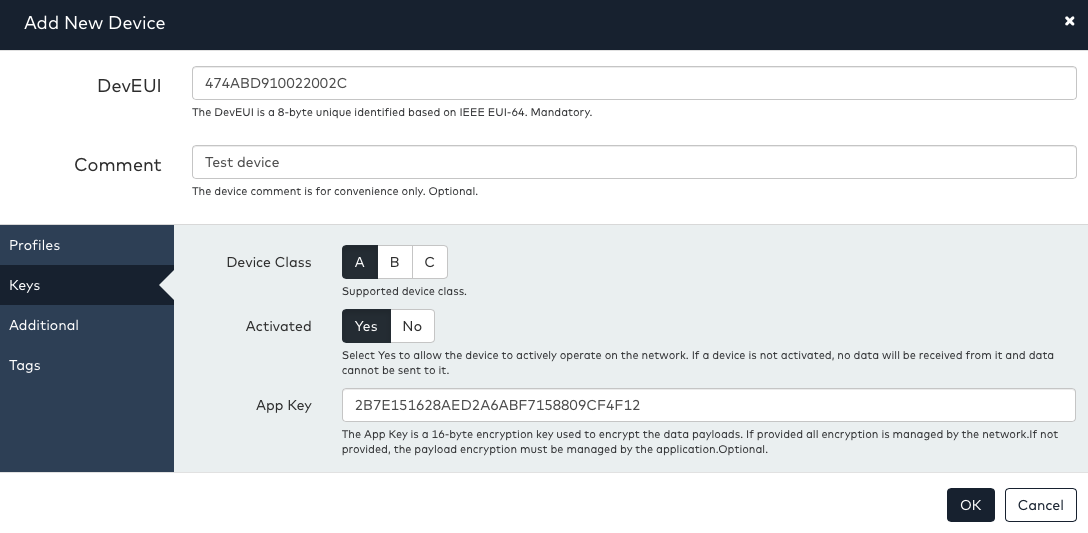
- To add Device via OTAA Activation mode, choose the Device Profile created for OTAA mode and enter the AppKey.
- To add Device via ABP Activation mode, choose the Device Profile created for ABP mode and enter the DevAddr, Nwkskey and Appskey
- Choose the applicable LoRaWAN Class either
AorBorC - Select the Activated option as Yes - this will enable the device to operate on the Network.
- Choose the applicable LoRaWAN Class either
- Then click
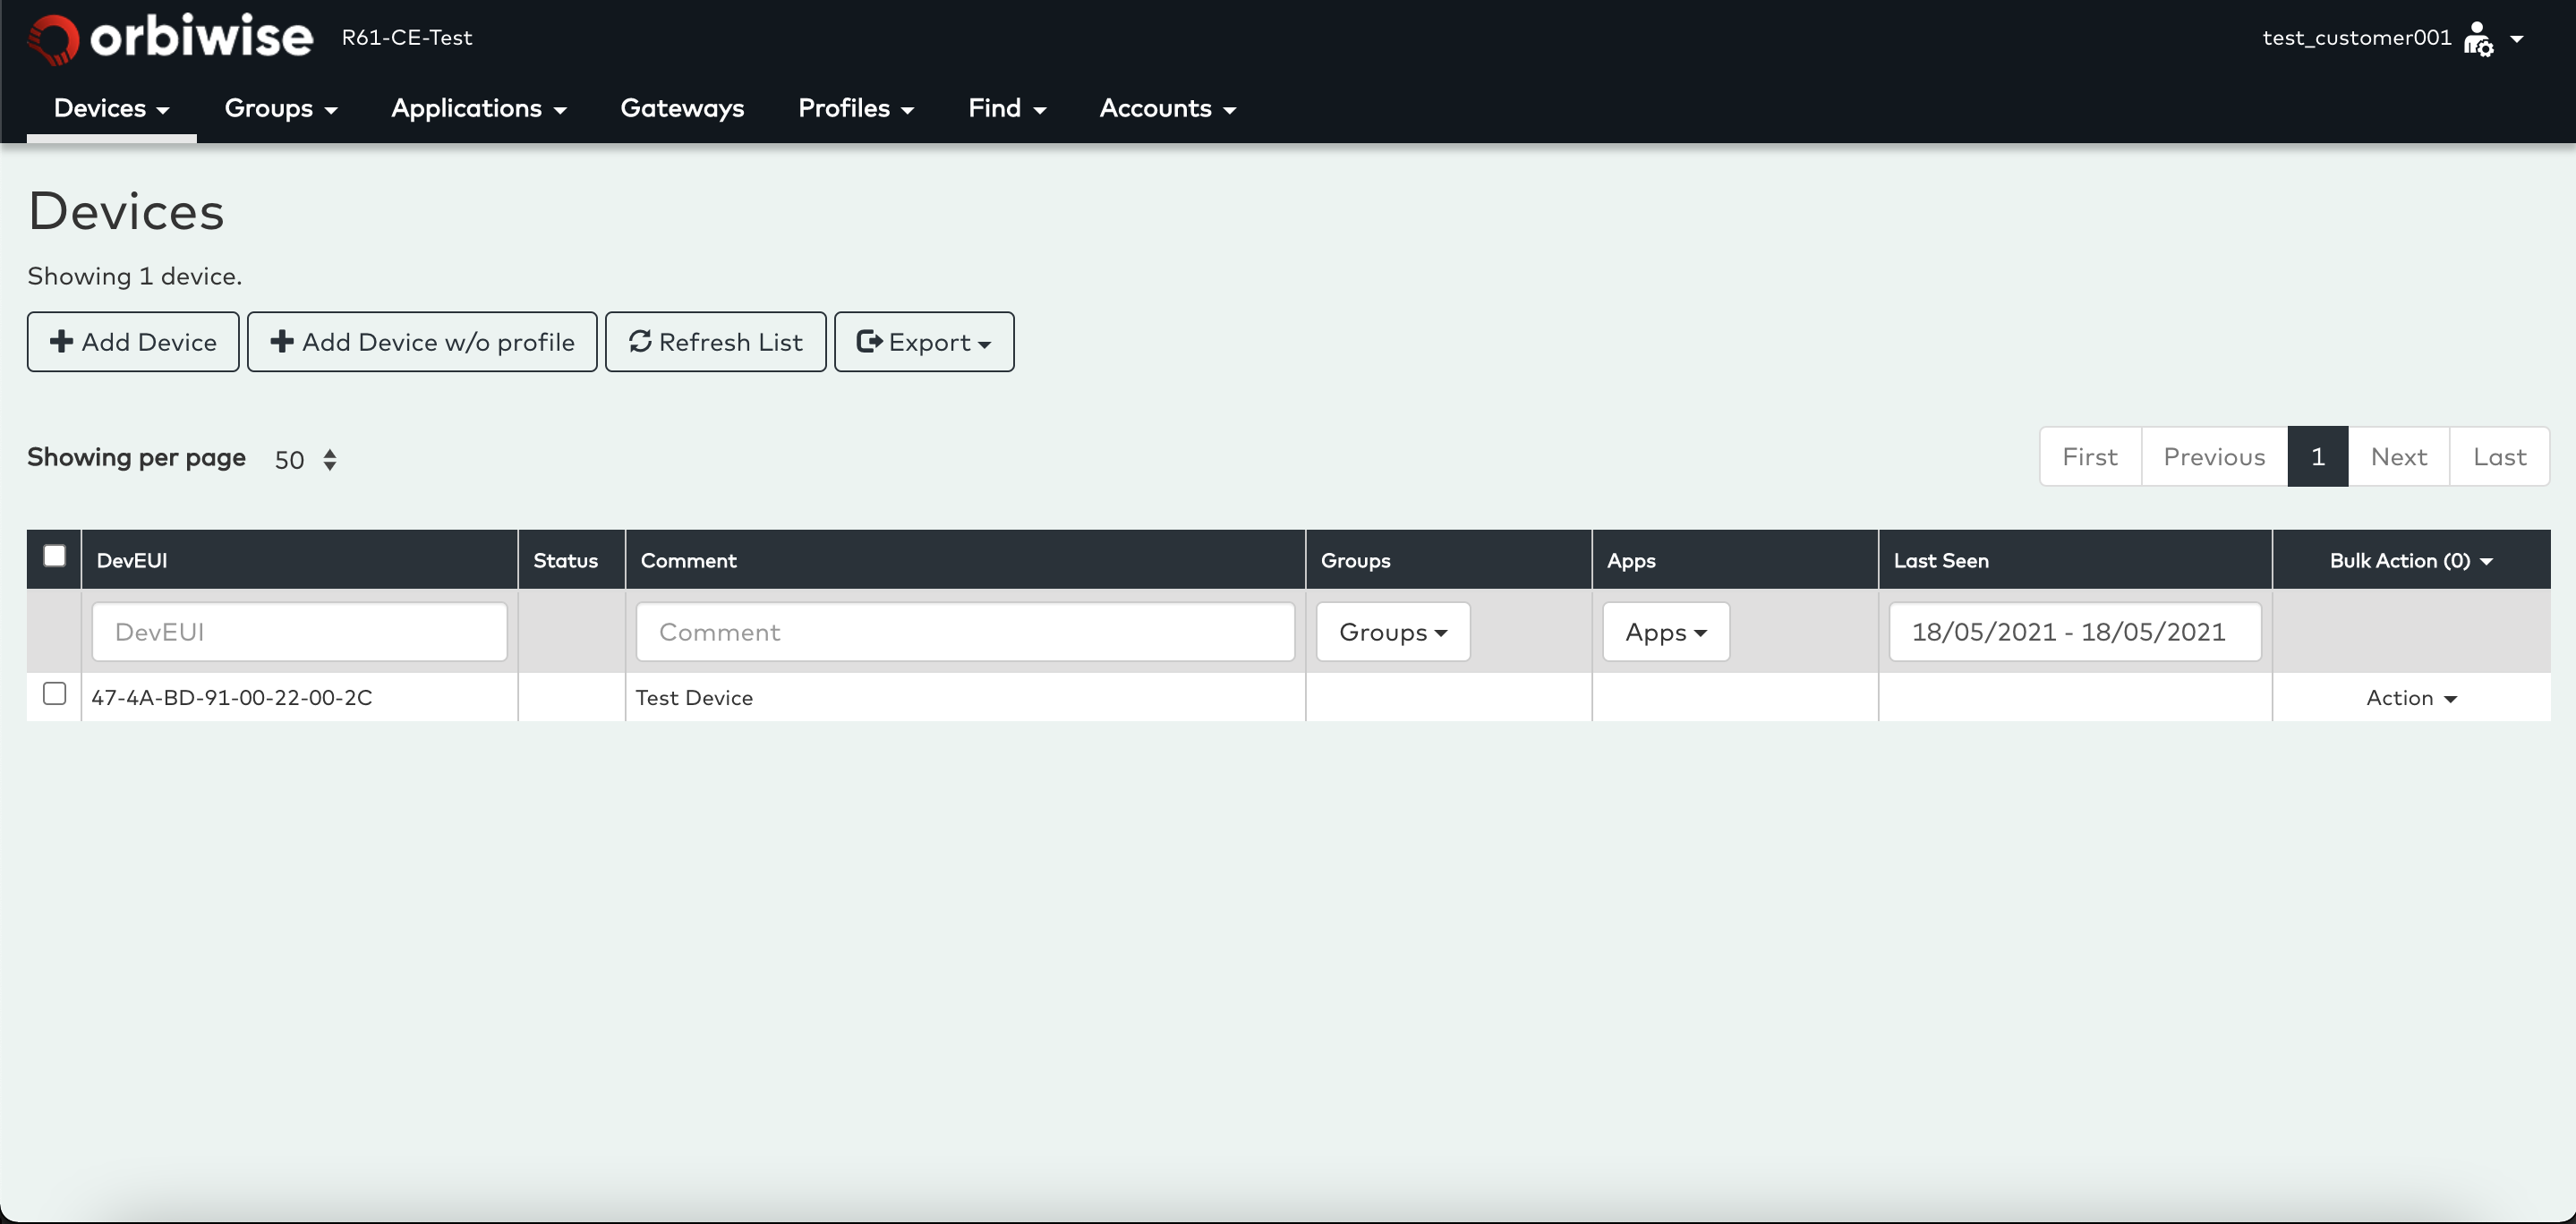
OK. The device will be registered as seen below:
As soon as you’re done with registering your devices and gateways, you will be able to see each device send a join request to the network. Once the device joins the network, it can start sending the uplink messages.
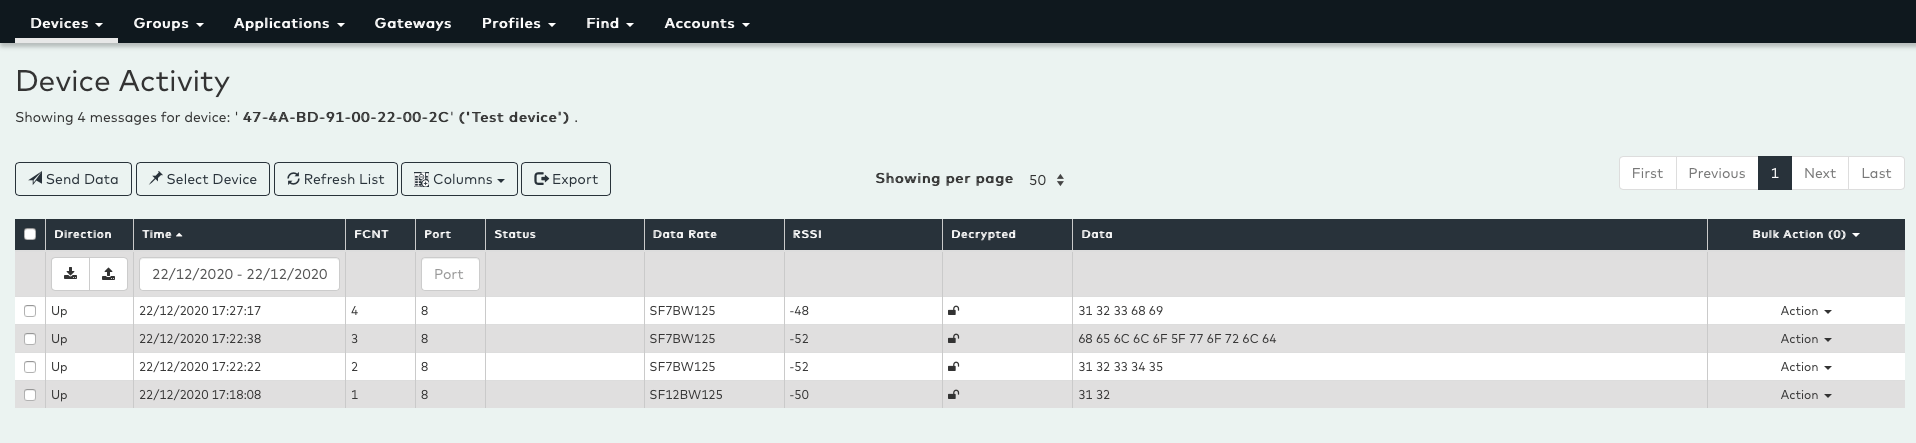
You can see each device’s payloads in Devices –> Select your device –> Action –> View Data.
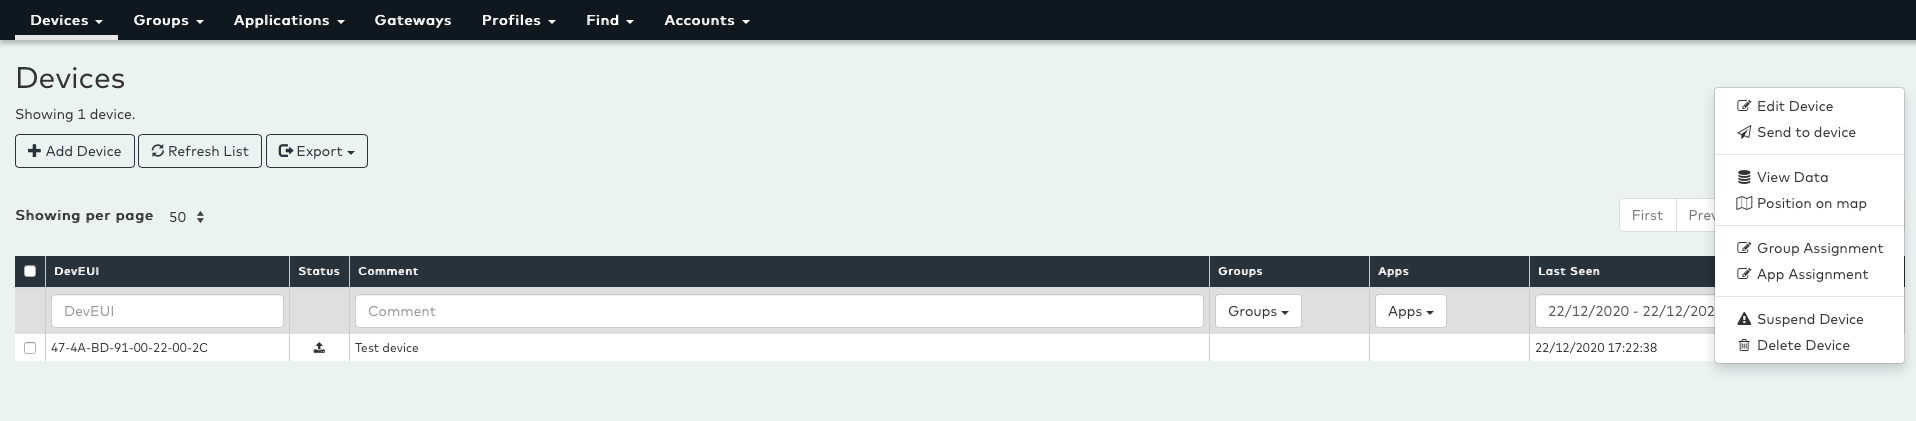
Clicking on the View Data button will open the Device Activity page where you can see all of the uplink and downlink messages of the selected device.
You can also watch the videos below to see the device registration process in action:
Device Join via ABP Activation Mode
Device Join via OTAA Activation Mode
Add device without Profile (Legacy)
To add the device without profile, click on Add Device w/o profile.
- An Add New Device window will popup, enter the
DevEUI, and an optionalComment.
Under the Keys tab.
-
Select
Registration TypeasOTAAorABP. -
Enter the
App Keyprovided for the device.
Under the LoRa Parameters tab.
- Select the required
Device Classas per the required classAorBorC.
Under the LoRa Location tab.
- Select
EnableorDisableforLoRa Location.
You can also watch the videos below to see the device registration process in action:
Device Join via ABP Activation Mode (Legacy)
Device Join via OTAA Activation Mode (Legacy)
Add Application
OrbiWAN offers you an option to push all Uplinks and Downlinks to your designated application. To enable this feature, you need to add an application inside OrbiWAN. Once an application is in place and attached to a particular device, all this device’s payloads will be pushed to the particular application.
To add an application follow the simple steps below:
- Navigate to the Applications menu –> Add Application
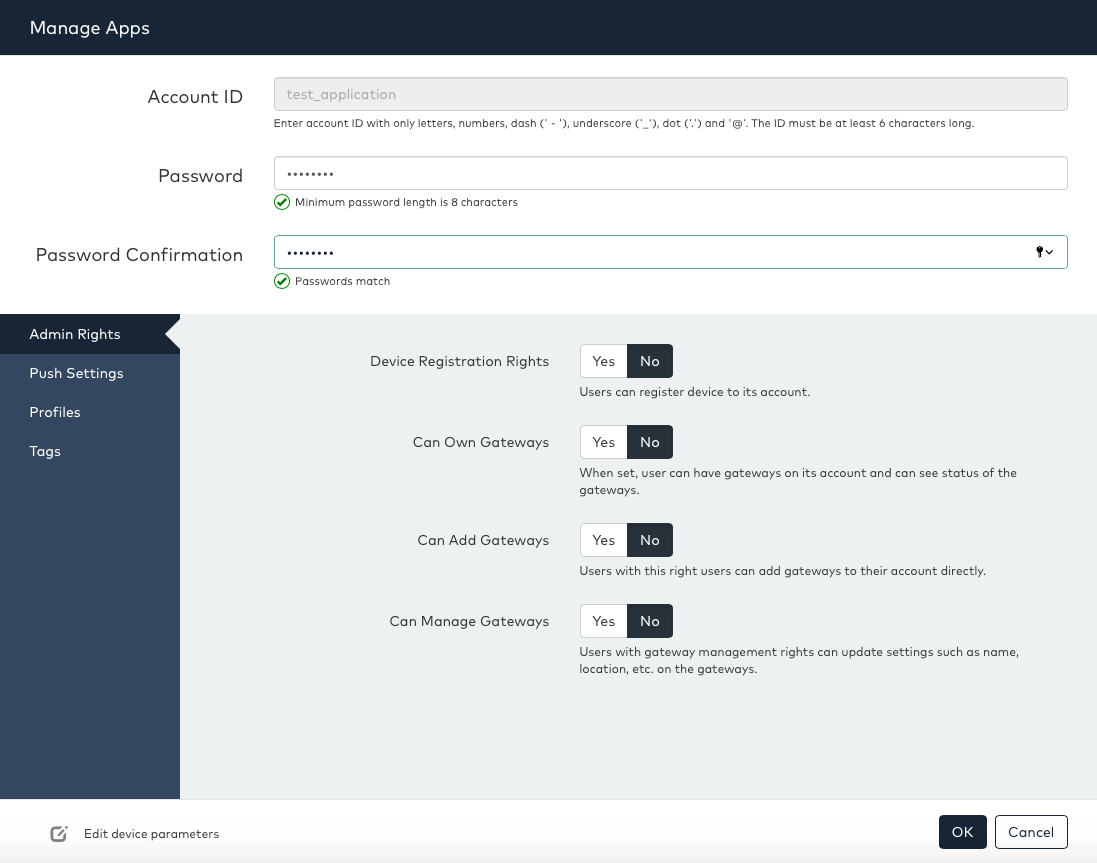
- This will open Manage App which allows you to add an application.
- Enter an Application name in the Account ID.
The Push Settings tab allows the user to directly configure the application account to make push notification to the external application. Push notification are sent to an HTTP(S) server, the hostname and port number must be entered. The screenshot below shows the available fields for push the settings form.
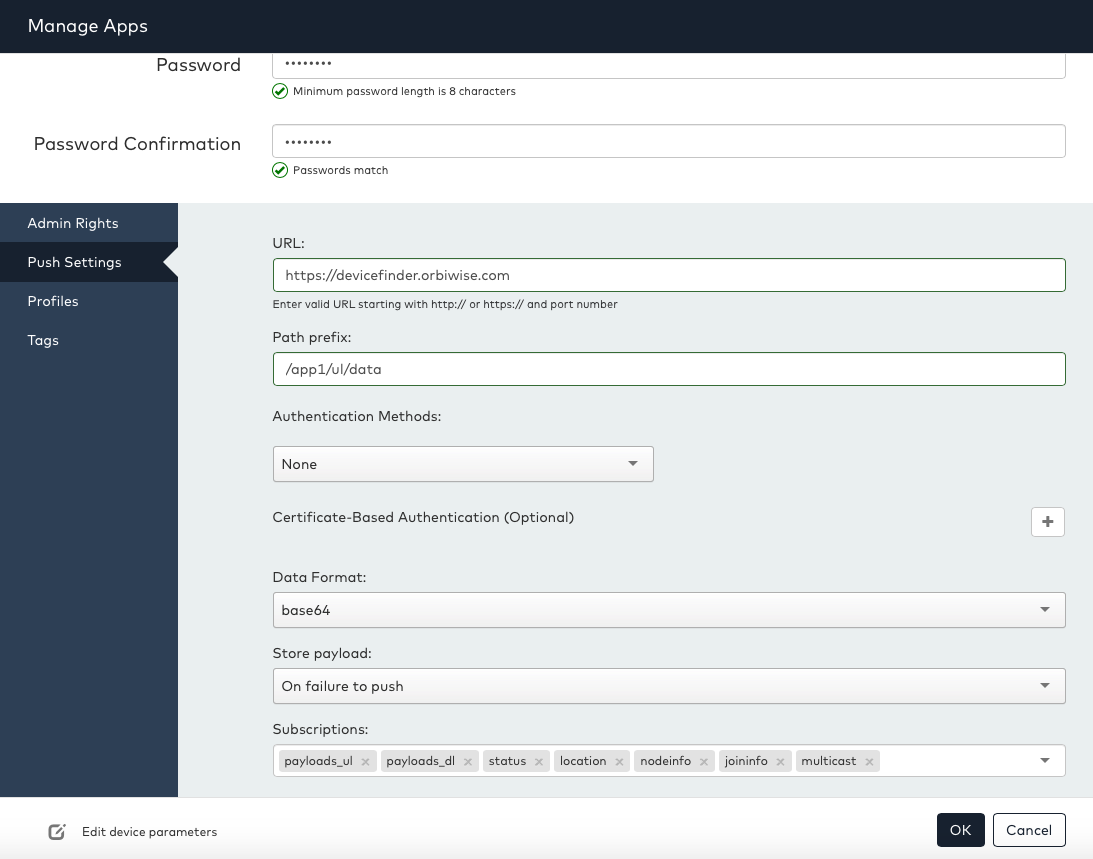
As seen in the screenshot:
- The Hostname is the DNS or IP of the external HTTP/HTTPS application.
- The Port must be entered if external application is using specific port.
- The Path prefix is the external application URL where the packets to be pushed, i.e /app2/ul/data from application URL (https://app.orbiwise.com/app2/ul/data)
- In case the external application supports Authentication, OrbiWAN can be configured to use it to make connections.
Once you’re done adding the application, You need to start the application via Action –> Start Push which will start pushing all the payloads to the application.
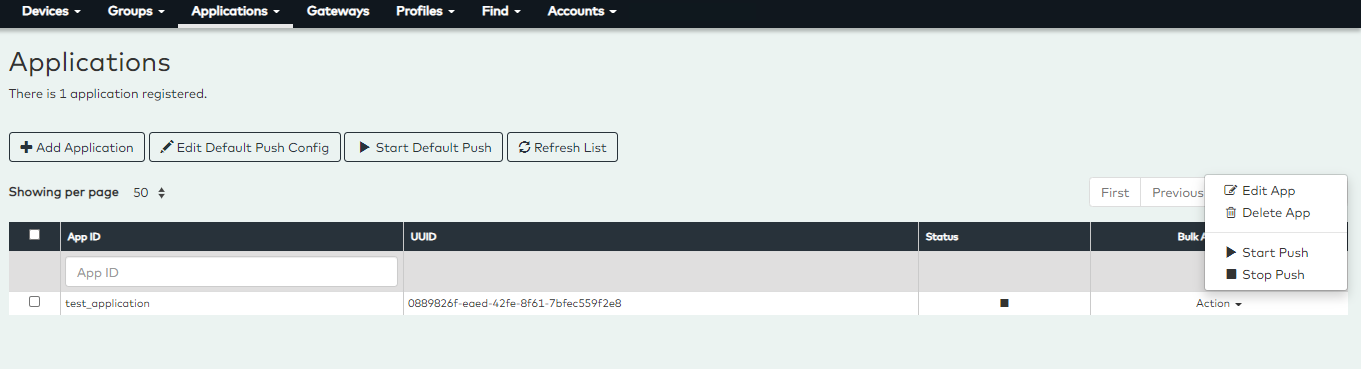
Each application will only receive data from the particular devices this application is assigned to. The next section will help you to assign application to devices.
Assign Application
Once you have created an application account, you need to assign this application to the particular device(s) this application is assigned to:
- Navigate to Devices -> Action -> App Assignment
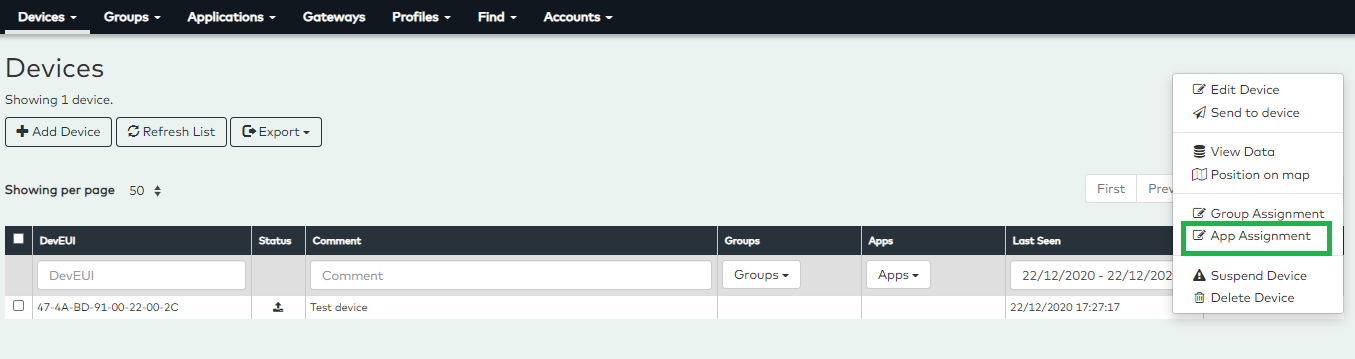
- Select the created Application
- Click on Add button as below:

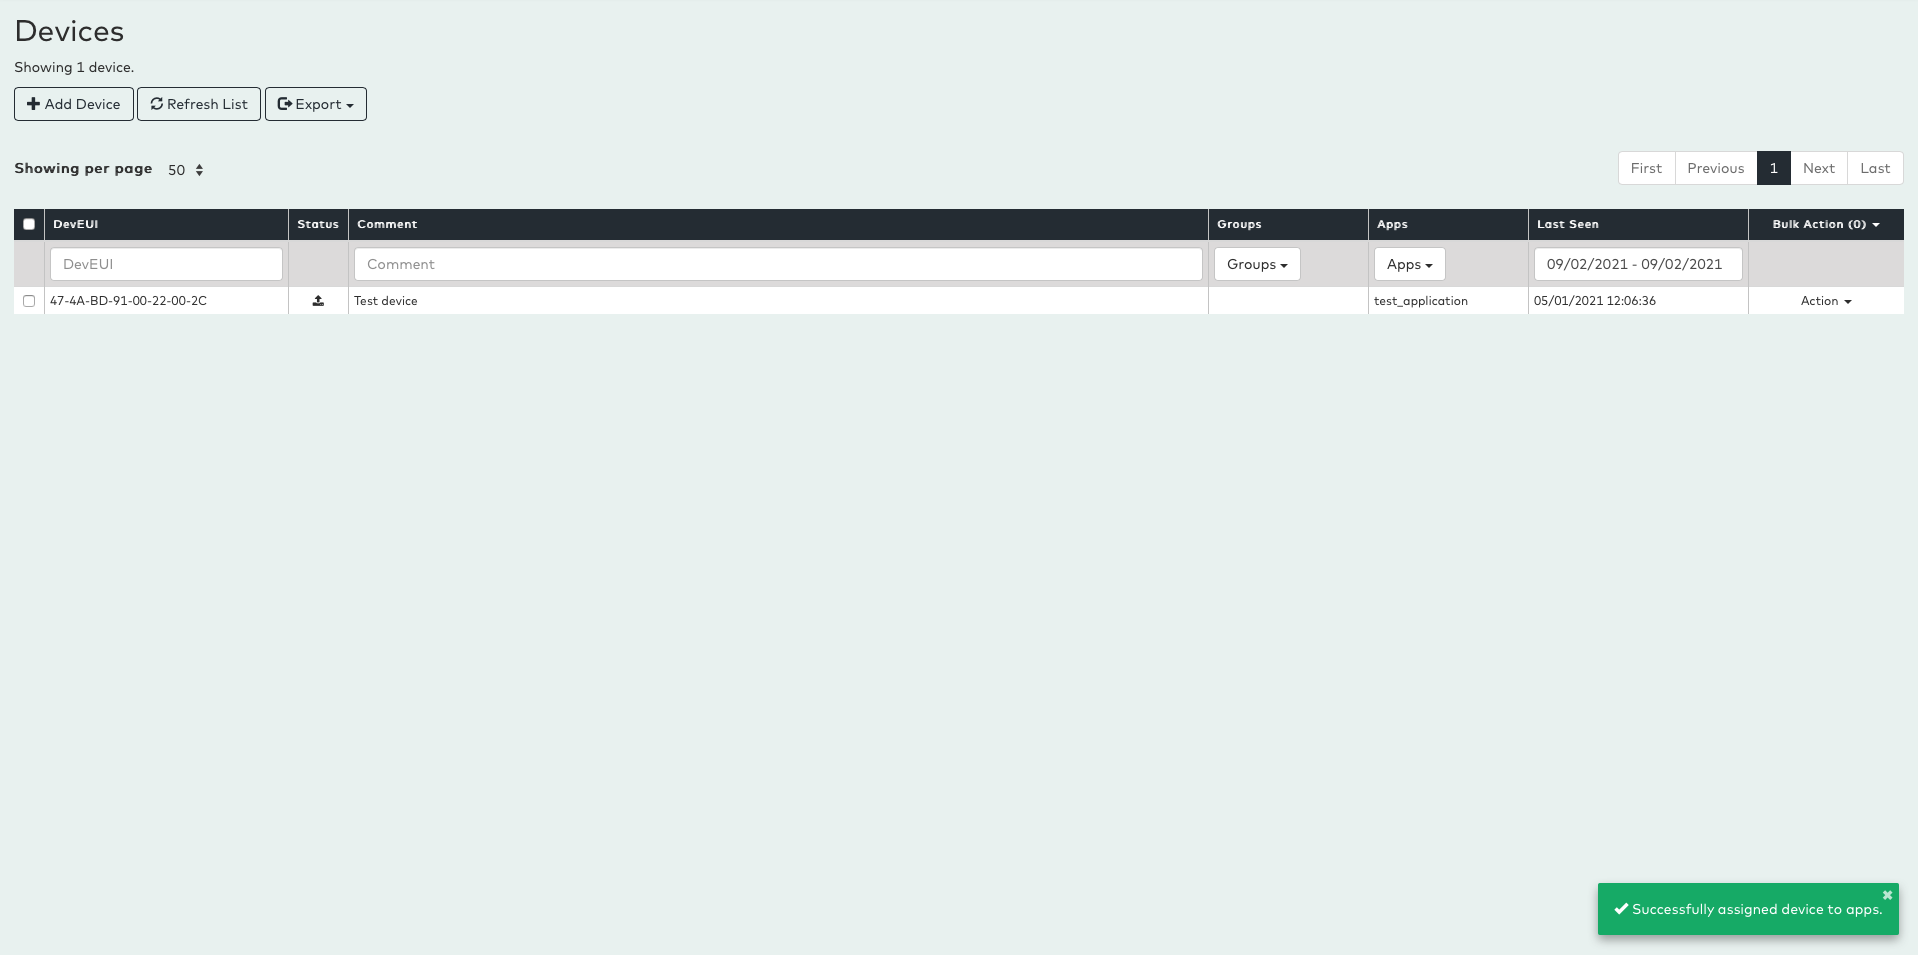
Once your application is assigned to the device, OrbiWAN will start pushing the real time device traffic to your assigned application.
You can also watch the following video to see the Application Management process in action: