Application Management
An application account is similar to a normal user account but it only exposes the part of the API that relates to devices. An external application can access a user’s devices using the credentials of the application account. Devices must be assigned to the application account before they can be accessed by the application account. A device can be assigned to multiple applications.
Applications can access the data from the devices via the REST API and can receive push updates directly whenever an uplink/downlink is received or when there is a change in state on one device. Often a user will have many different types of devices that may be connected to different applications.
There are two ways to create an application:
- UI
- REST API
Creating Application from UI
User can Login to UI and follow the below steps:
- Go to Applications tab
- Click on Add Application. Pressing the Add Application button brings up the following Manage Apps window for user to enter the details of the application account.
The account can be assigned with a sub-set of the rights of the users account and add the payload push settings for HTTP/HTTPS interface.
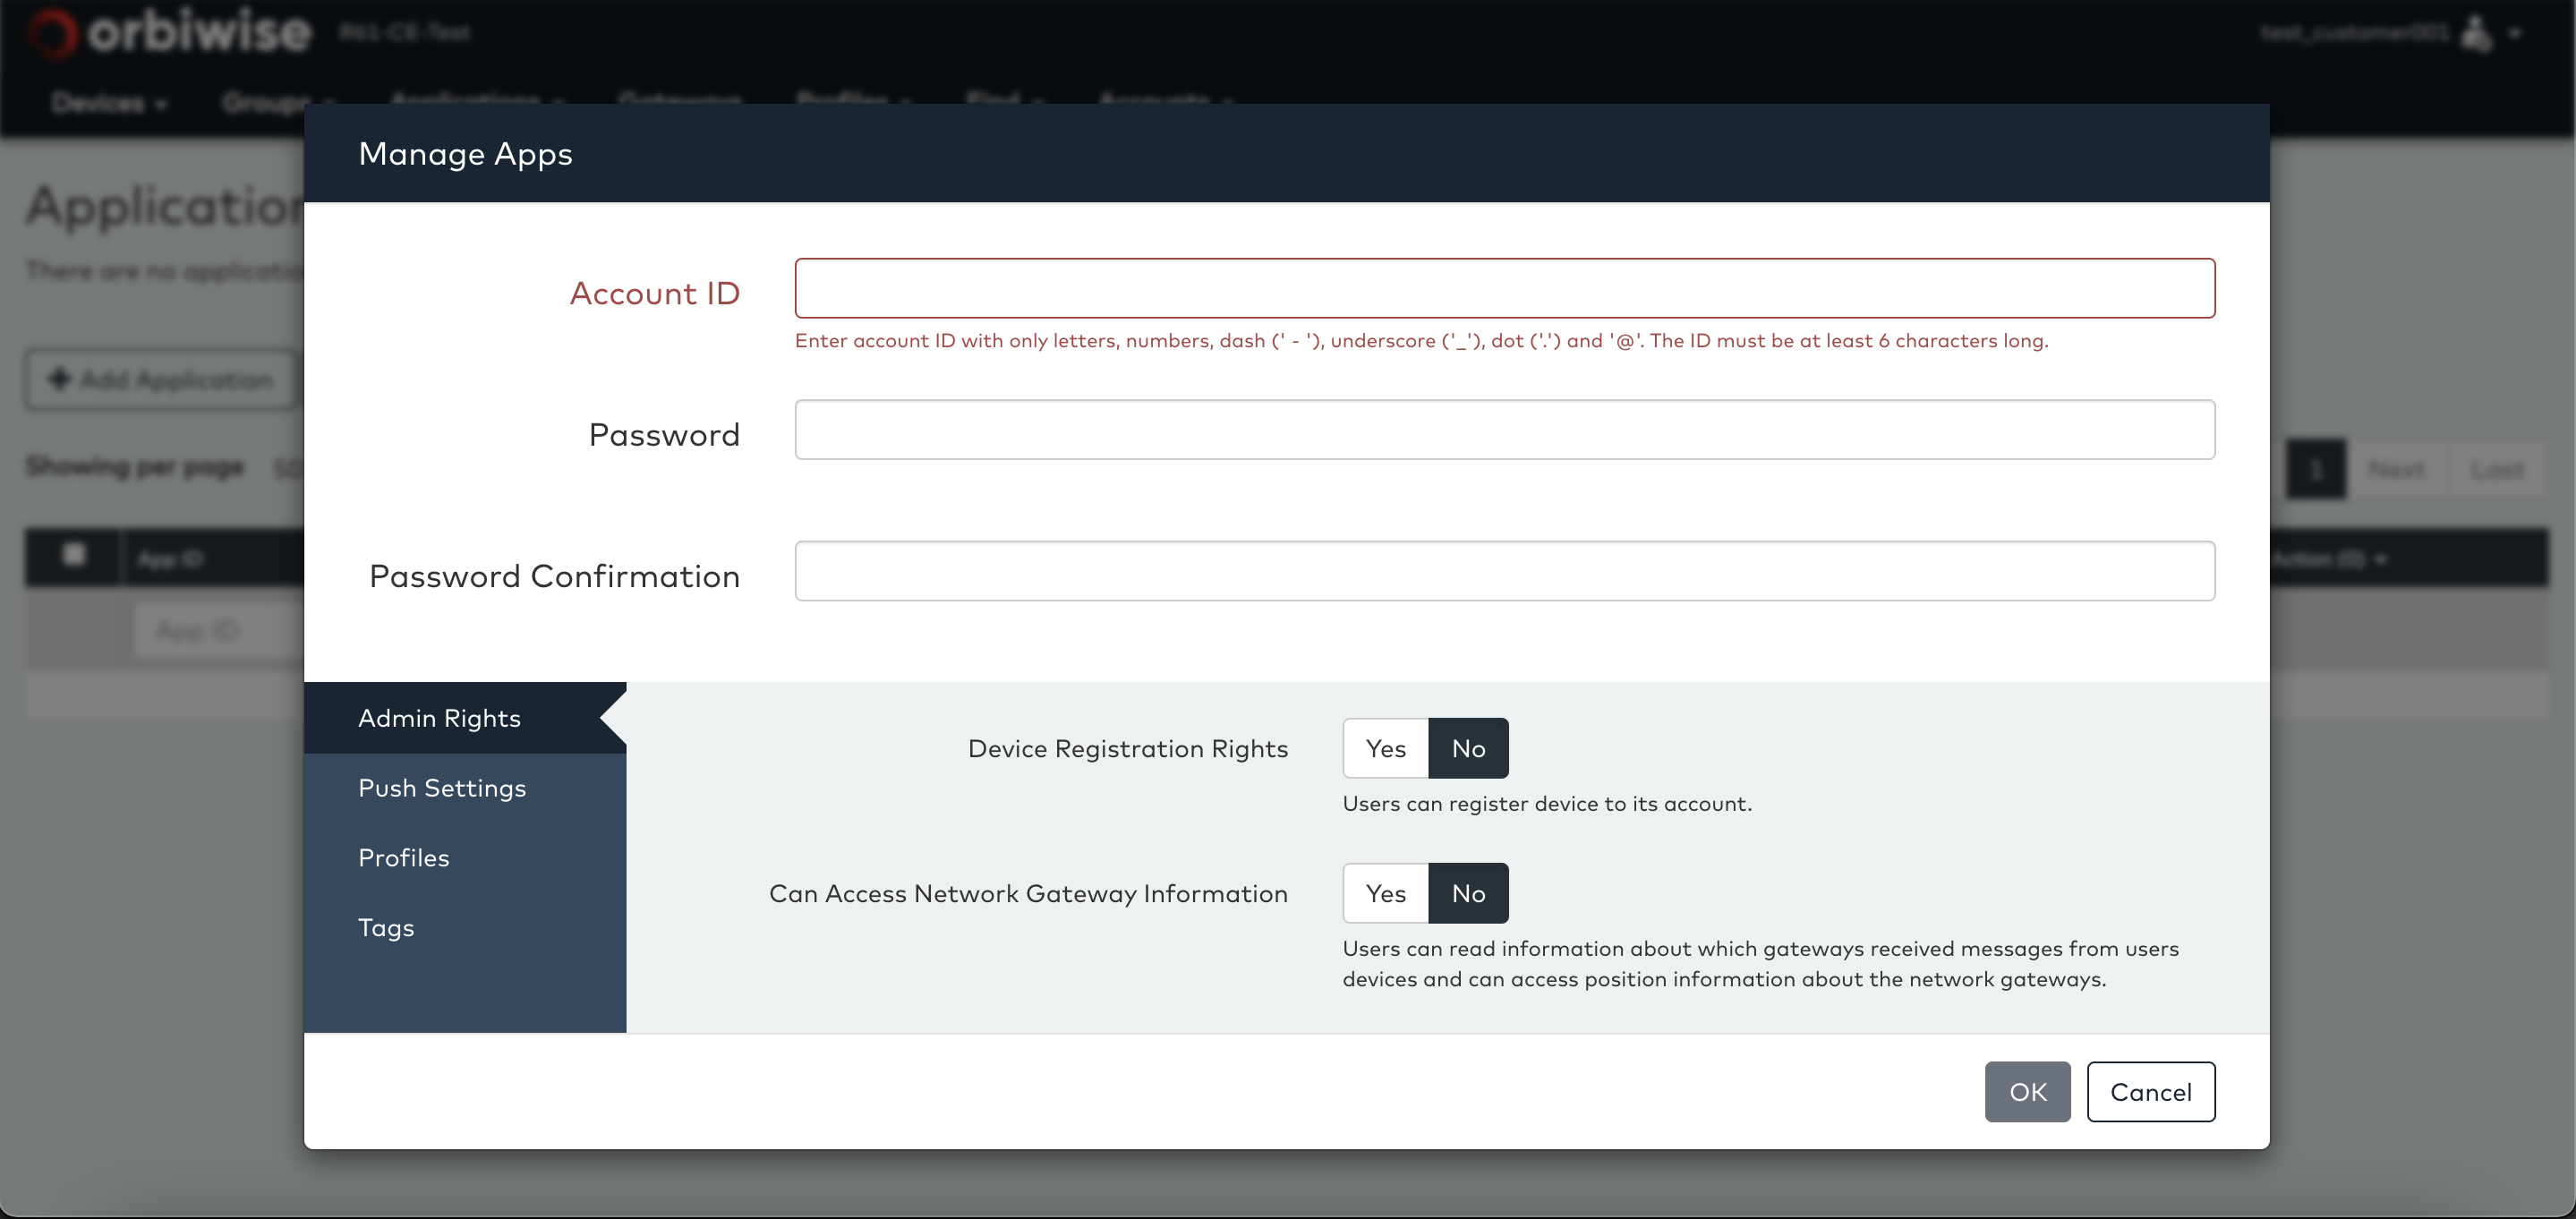
Application with Device Registration Rights rights (referred to as the can register rights in the user provisioning REST API) can add / delete / modify devices on its own account. Application without this right cannot manage its own devices from Application (it can still access the devices data) and must rely on an administrator to perform the device provisioning.
The Can Own Gateways right must be set on Application accounts that can manage their own gateways. Application that do not have this right will see all gateway related REST API as non-existent and cannot have gateway assigned to it.
The Can Add Gateways application with right can gateway to there directly.
The Can Manage Gateways right is an additional right that can be assigned to accounts with the Can Add Gateways right. This right allows modification of some gateway parameters such as the position of the gateway and assigned name. Changes of these parameters will reflect on gateway.
Push Settings tab allows the user to directly configure the application account to make push notification to the external application
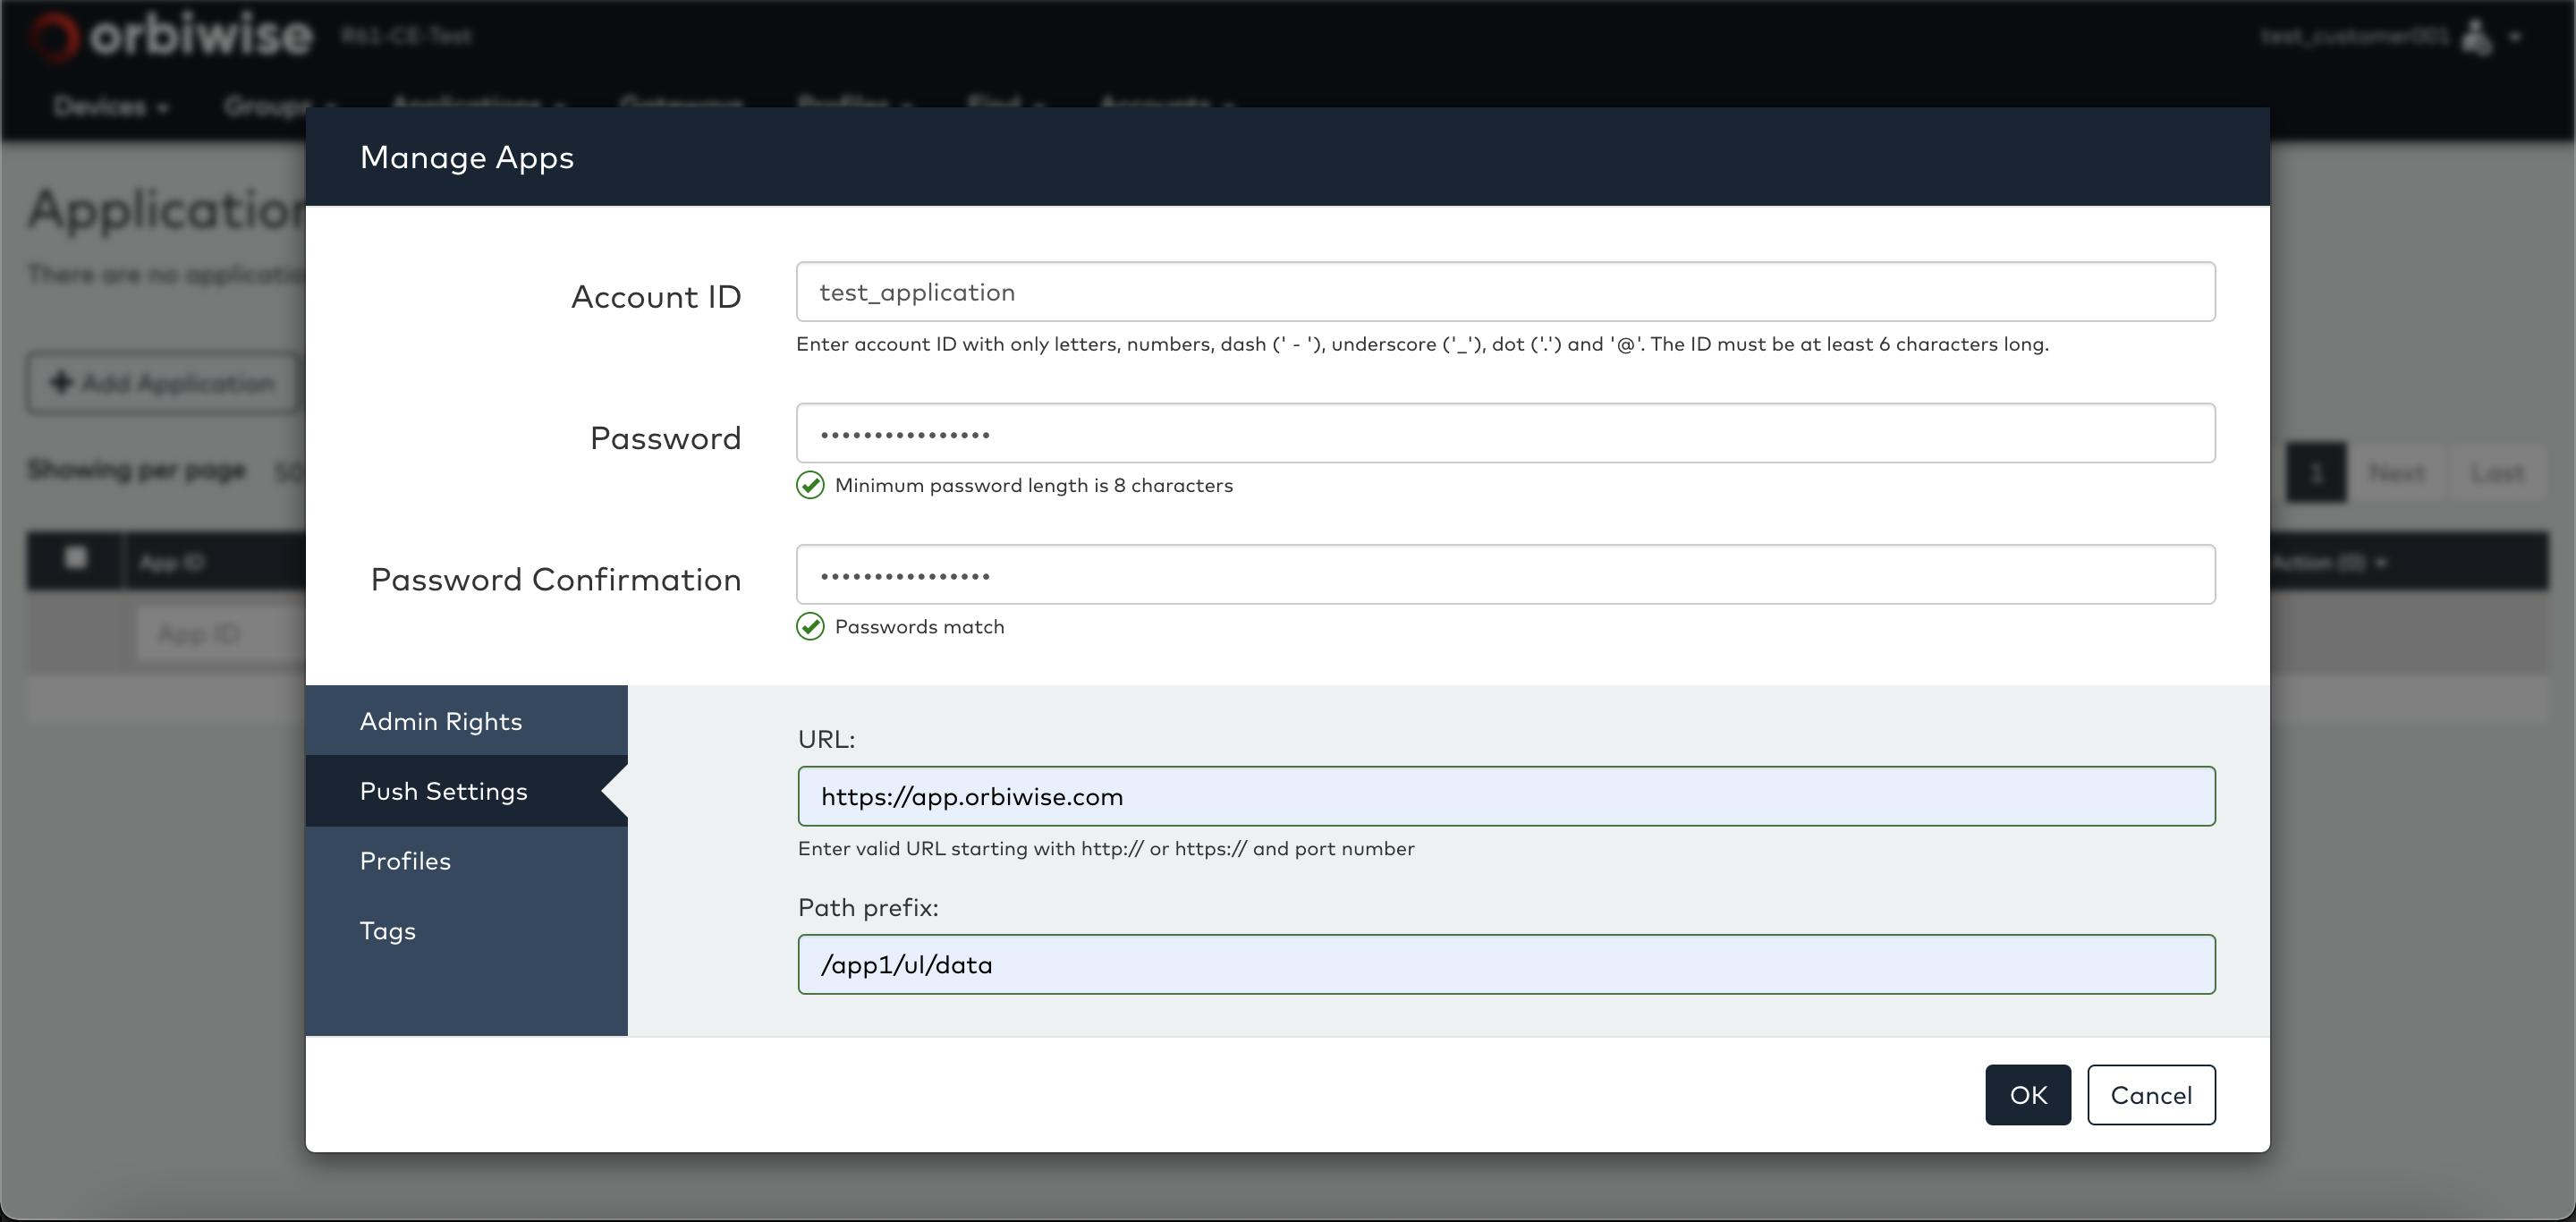
Push notification are sent to a HTTP(S) server and the URL must be entered. An option Path prefix can be specified too as can the optional access credential that the OrbiWAN will use to make the connection to the application.
Assign Application to the Specific Devices:
Applications accounts only give access to (and send push notification for) devices that has been assigned to it. Devices are assigned to an application by following ways,
Go to Manage Devices -> select the devices -> click on “Action” -> select App Assignment from dropdown list,
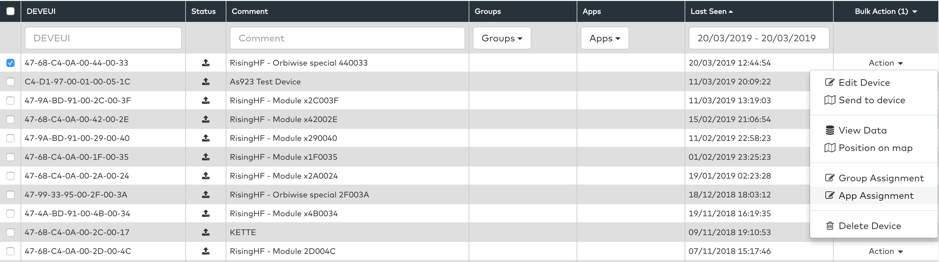
On clicking App Assignment option will brings up the Manage Apps window, then select App ID (Application) -> then click on Add button,

Push notification is disabled by default but can be enabled and disabled from the option Start Push/Stop Push available in Action dropdown list on the right of each application account as describe in below picture,

The OrbiWAN will start pushing the payload to the application once the “Start Push” mode has enabled and in this case OrbiWAN will not store payloads anymore in database that are pushed to application successfully.
Global Push Configuration:
A default application can be assigned to all the devices in a current user profile through creating/setting up a Global Push Configuration. This is done from the Applications page using Edit Default Push Config option.
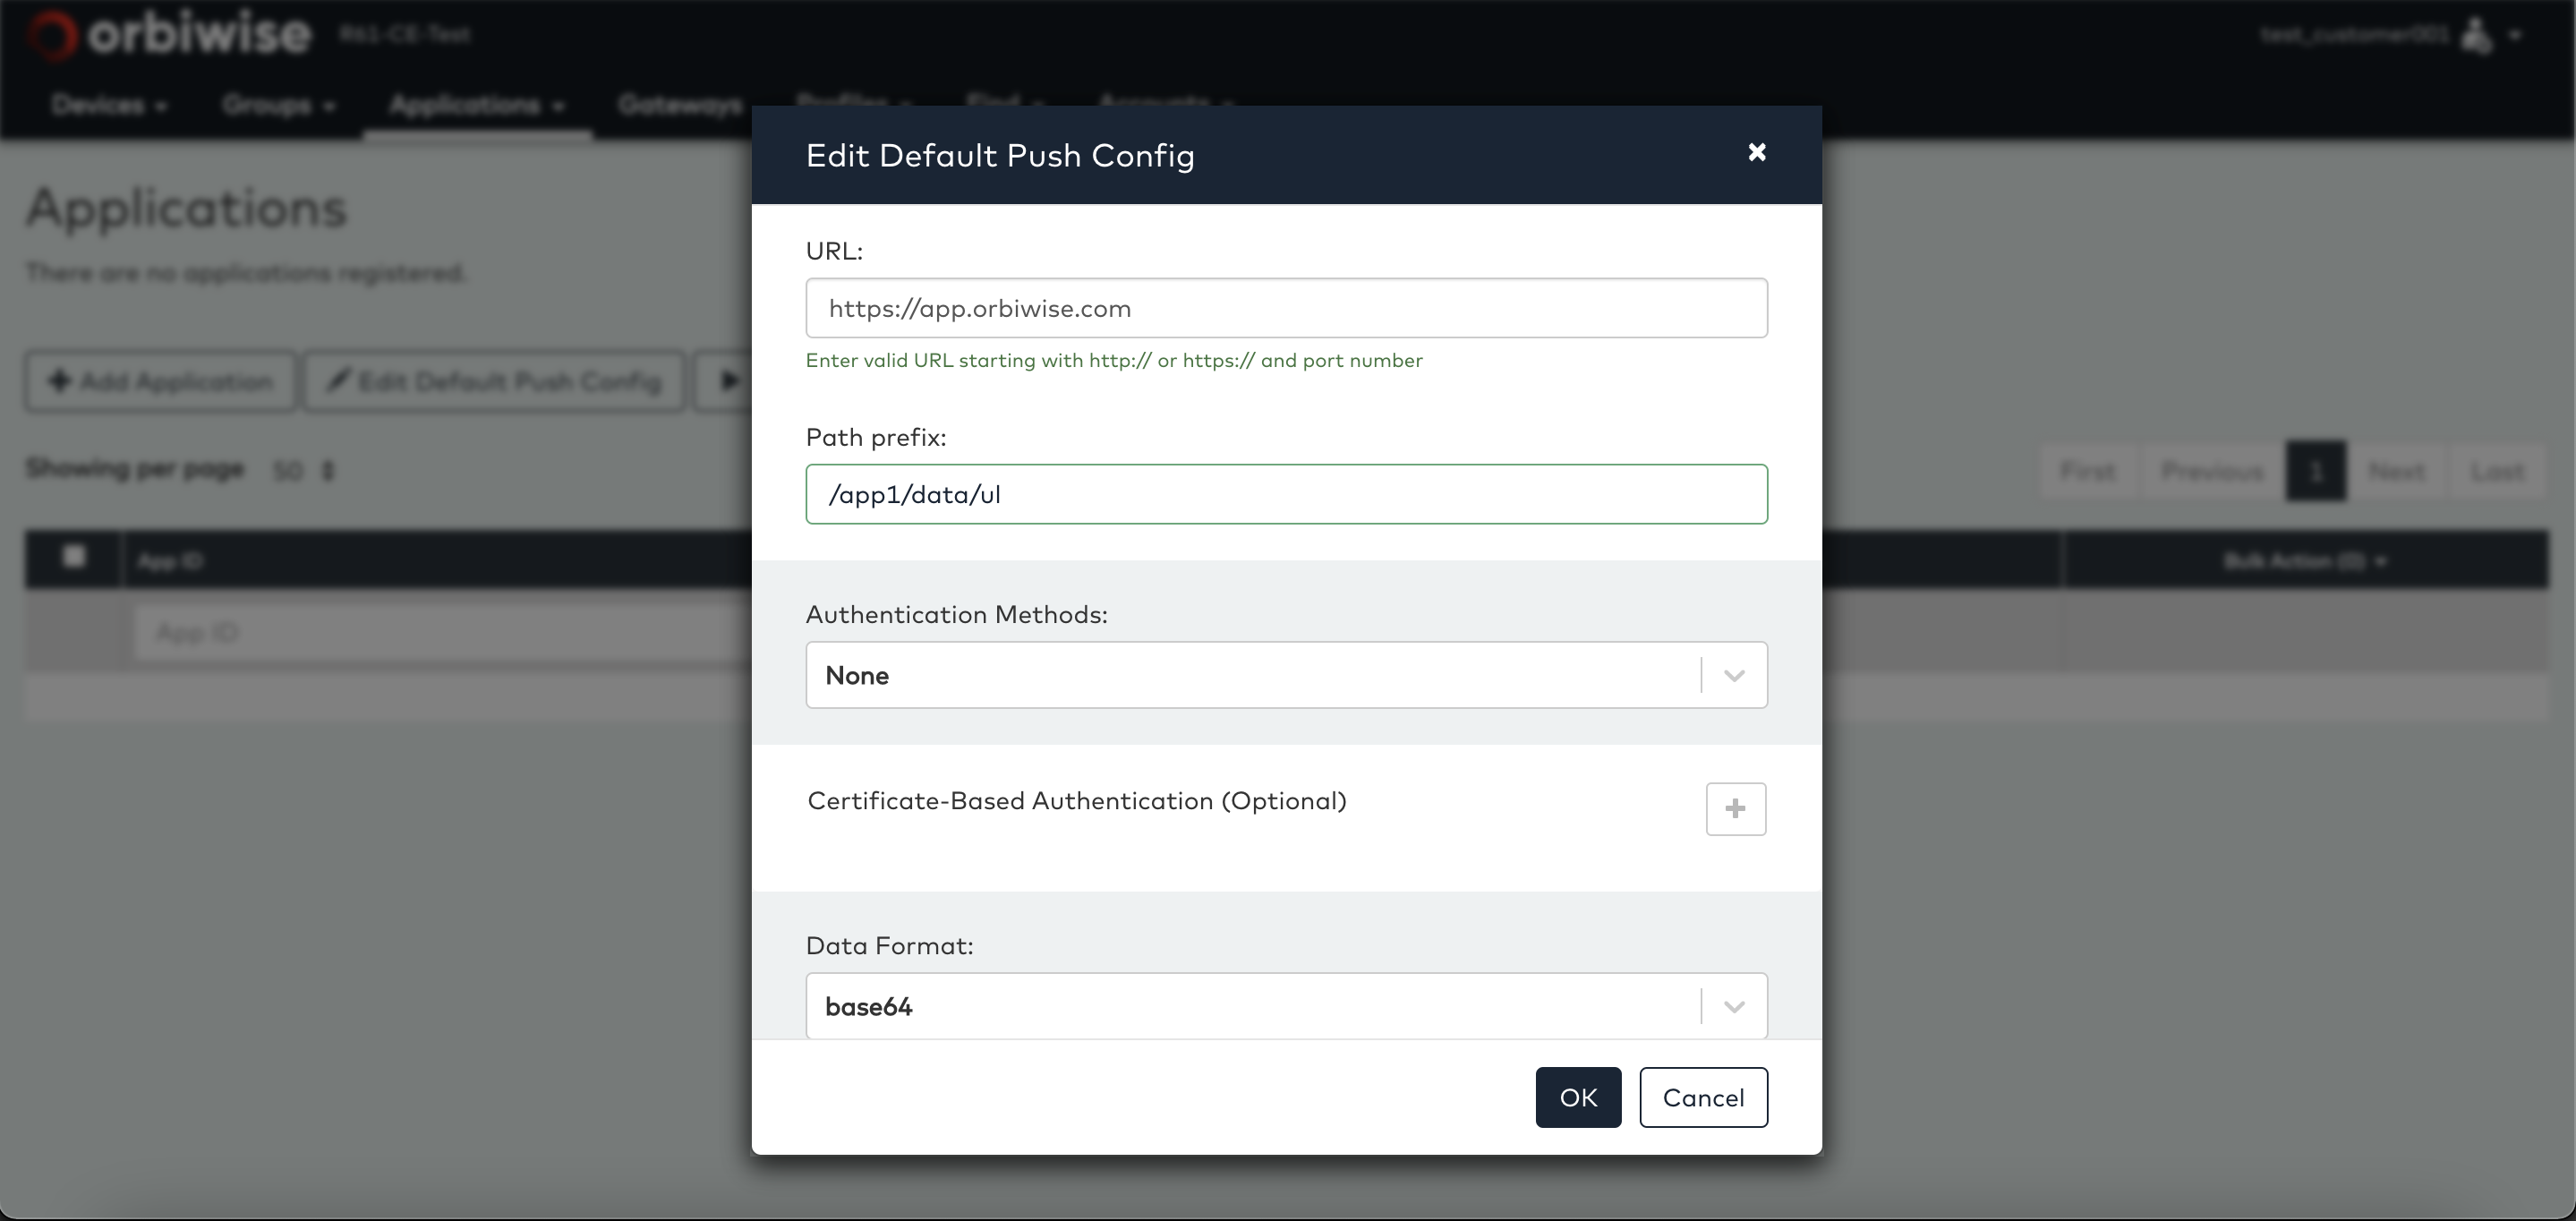
After setting up Global Push Configuration, user has to enable “Start Default Push” mode to push payloads to the application.
HTTP/HTTPS Push Mode
When an application wants to receive push message from the OrbiWAN server it must first implement a HTTPS host interface that can be reached from the OrbiWAN and identified by a hostname or IP address. The application can then register the interface on the OrbiWAN and start push mode, which will cause the OrbiWAN to push any new payload or update in status directly to the application host interface.
Procedure to Push packets to the Application Server via HTTP/HTTPs:
Note : OrbiWAN server will not store any payload once it is successfully pushed to application.
The application must implement the paths specified in previous sections for each of the different types of push messages.
There are following types of push notification messages that are sent, application can decide to subscribe to only a subset of them,
- payloads_ul
- payloads_ul_early
- payloads_dl
- multicast
- status
- nodeinfo
- join
- joininfo
Each of the above push notification message types are described in the following table,
| Notification | Description |
| payloads_ul_early | Uplink message received. The message body contains the uplink message data and port number. This notification is sent as early as possible to allow the application to be able to respond to the message and have it send back to the device on the immediate following downlink opportunity. |
| payloads_ul | Uplink message received. The message body contains the uplink message data and port number, and the RSSI and SNR of the best gateway that received the data. Further depending on the rights of the application. |
| payloads_dl | This notification is send with the status of a scheduled downlink. The notification will be send when the downlink have actually been sent, and in case of confirmed downlink, when the downlink have been (or not) acknowledged. If an error happened on the downlink this will also be indicated on this notification. This notification may be send several times as the state changes. |
| multicast | The multicast status is similar to the payloads_dl message, but is for multicast messages. |
| nodeinfo | A nodeinfo notification is sent tell the application that the state of a device has changed. This is the case when the network schedules a downlink without request from the application. In this case the downlink FCNT counter is incremented, and the nodeinfo notification is send to notify the application of this change. |
| status | The status notification is sent when the device have reported back the DevStatusAns which report the battery level of the device and the downlink link margin. |
| join | Raw LoraWAN join message sent to the application when the application want to manage directly the JOIN procedure and process the JOIN-REQ, JOIN-ACCEPT and session keys. |
| joininfo | Send when the a device have send a join request message and the network has accepted the device. |
You can also follow the video to see it in action.
Application Management
MQTT Push Mode
An application can connect to the OrbiWAN using the MQTT(s) protocol. To connect the application, the user must provide the credentials of their user account.
URL: mqtts://dass-host[:port]
Credentials mandatory: account username/password
Once connected the application must subscribe to channels to receive the push information. The available channels are:
- username/payloads_ul
- username/payloads_dl
- username/nodeinfo
- username/status
- username/join (* not currently available)
- username/joininfo
Once a subscription has been made the OrbiWAN will send message to the application using the above listed channels. The payloads are in the same JSON format as their REST push versions. The REST message is encapsulated in an outer object with the name of the message type. i.e Channel JSON Message
| MQTT topic | JSON body |
| username/payloads_ul | { "payloads_ul": {...} } |
| username/payloads_dl | { "payloads_dl": {...} } |
| username/multicast | { "multicast": {...} } |
| username/nodeinfo | { "nodeinfo": {...} } |
| username/status | { "status": {...} } |
| username/join | { "join": {...} } |
| username/joininfo | { "joininfo": {...} } |
Procedure to Push packets via MQTT protocol from DASS:
An application can connect to the OrbiWAN using the MQTT(s) protocol.
If user has subscribed on the payload topic via MQTT(s) then OrbiWAN server will send packets to MQTT(s) application and the pushed payload can be seen in UI.
We have one sample application build in node.js to run push tests via MQTT to application server,
Pre-requisites:
- Install node.js in the system from https://nodejs.org/en
- Copy ubiq-mqtt-client.js files in a directory, e.g Desktop/MQTT_Push
- Update file with OrbiWAN URL and credentials for the test,
// ubiq-mqtt-client.js:

var conf = {

    host: "dass.url",
    port: null,
    userid: "yyy",
    password: "zzz"

};
- Go to the directory where the file is copied and modified => e.g. cd Desktop/MQTT_Push
- Execute the following command, this will install the missing packages
- npm install MQTT
- Then run node ubiq-mqtt-client.js, it should show that it connect to the OrbiWAN
- Any new packet received by a device from the same OrbiWAN user account shall be pushed and thus displayed in window.
Following is the response of MQTT client:
    {
            "payloads_dl": {
            "confirmed": true,                      // optional, defaults to true
            "deveui": "aabbccdd00000000",
            "data": "aabbcc",
            "port": 10,
            "data_format": "base64" | "hex",        // optional, default to base64
            "fcnt": 12,                             // optional
            "mode": "fail_on_busy",                 // optional, default to enqueue_on_busy
            "session_id": "uuid-of-session",        // optional,
            "tag": "request-tag"                    // optional
        }
    }
Upon reception of the downlink message, provided there are no errors, the OrbiWAN immediately send back the following message:
Topic: username/payloads_dl
{
         "payloads_dl": {
            "deveui": "hex",            // DevEUI of the receiving device
            "id": 252,                  // unique ID of the dl payload
            "fcnt": 10,                 // the used downlink FCNT
            "port": 1,                  // the used port
            "transmissionStatus": 0,    // see table in section 4.4.5
            "session_id": "UUID",       // session ID when packet was created
            "tag": "request-tag"
        }
    }
The transmissionStatus is set to zero indicating that the payload have been enqueued. Note this message is only send back on MQTT and not pushed in general (i.e. applications listening for REST or Web-Socket will not receive this message).
In the even of an error, the following error object is sent:
Topic: username/payloads_dl
  {
        "error": {
            "tag": "request-tag",           // reference to requesting message
            "error_msg": "error message",
            "status_code": 404              // REST style status code, e.g. 404 not found
        }
  }
Multicast via MQTT:
Multicast message can be send via MQTT by sending the following message:
Topic: username/send_multicast
   {
        "multicast": {
            "groupid": "group-id",
            "data": "aabbcc",
            "port": 10,
            "data_format": "base64" | "hex",        // optional, default to base64
            "fcnt": 12,                             // optional
            "mode": "fail_on_busy",                 // optional, default to enqueue_on_busy
            "tag": "free-text-tag"                  // optional
        }
    }
Topic: username/multicast
    {
        "multicast": {
            "groupid": "group-id",      // multicast group id
            "id": 252,                  // unique ID of the dl payload
            "fcnt": 10,                 // the used downlink FCNT
            "port": 1,                  // the used port
            "transmissionStatus": 0,    // see table in section 4.4.5
            "session_id": "UUID",       // session ID when packet was created
            "tag": "request-tag"
        }
    }
The transmissionStatus is set to zero indicating that the payload have been enqueued. Note this message is only send back on MQTT and not pushed in general (i.e applications listening for REST or Web-Socket will not receive this message).
In the even of an error, the following error object is sent:
Topic: username/multicast
   {
        "error": {
            "tag": "request-tag",           // reference to requesting message
            "error_msg": "error message",
            "status_code": 404              // REST style status code, e.g. 404 not found
        }
    }